Tailwind CSS offers powerful capabilities to build visually appealing websites in a short time frame. To give your website a unique look and feel, you can choose to add custom fonts to NextJS project using Tailwind configuration.
Setting up a custom font in Next.js using Tailwind CSS is fairly easy. It needs 3 easy steps.
- Installation and setting up
_document.js - Declaring custom font family in
tailwind.config.js - Using it in your components and pages.
For this tutorial, we will use Montserrat, a free Google Font. So let us begin installation process.
Create Your NextJs Project
The quickest way to start using Tailwind CSS in your Next.js project is to use the Next.js + Tailwind CSS Example. This will automatically configure your Tailwind setup based on the official Next.js example. If you’d like to configure Tailwind manually, continue with the rest of this guide.
Create your project
Start by creating a new Next.js project if you don’t have one set up already. The most common approach is to use Create Next App.
npx create-next-app nextjs-tailwind-tips
cd nextjs-tailwind-tips
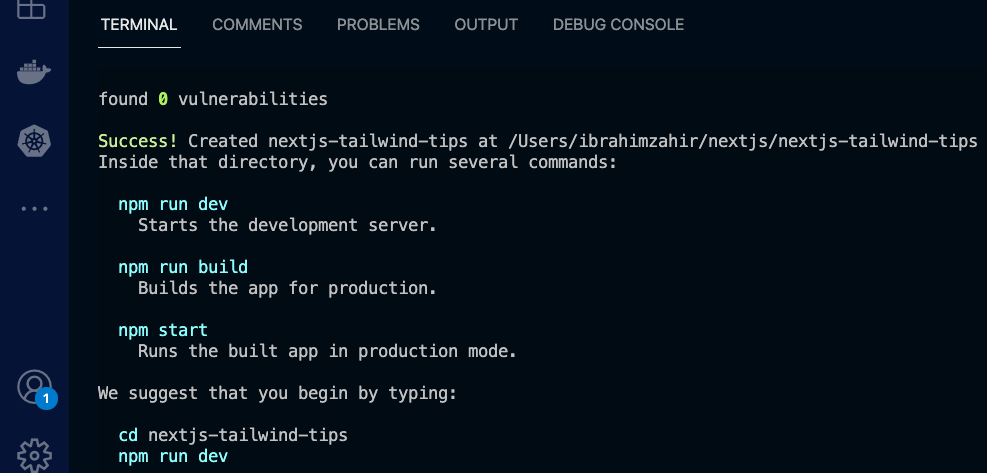
If everything has goes well, you will see something like this on your terminal.

Install Tailwind CSS
Install tailwindcss and its peer dependencies via npm, and then run the init command to generate both tailwind.config.js and postcss.config.js.
npm install -D tailwindcss postcss autoprefixer
npx tailwindcss init -p
Configure your template paths
Add the paths to all of your template files in your tailwind.config.js file.
module.exports = {
  content: [
    "./pages/**/*.{js,ts,jsx,tsx}",
    "./components/**/*.{js,ts,jsx,tsx}",
  ],
  theme: {
    extend: {},
  },
  plugins: [],
}
Add the Tailwind directives to your CSS
Add the @tailwind directives for each of Tailwind’s layers to your ./styles/globals.css file.
@tailwind base;
@tailwind components;
@tailwind utilities;
Add Google Font to _document.js File
A custom Document can update the <html> and <body> tags used to render a Page. This file is only rendered on the server, so event handlers like onClick cannot be used in _document.
To override the default Document create a new custom document file _document.js in your pages folder next-project/pages/ and set it up with the following code:
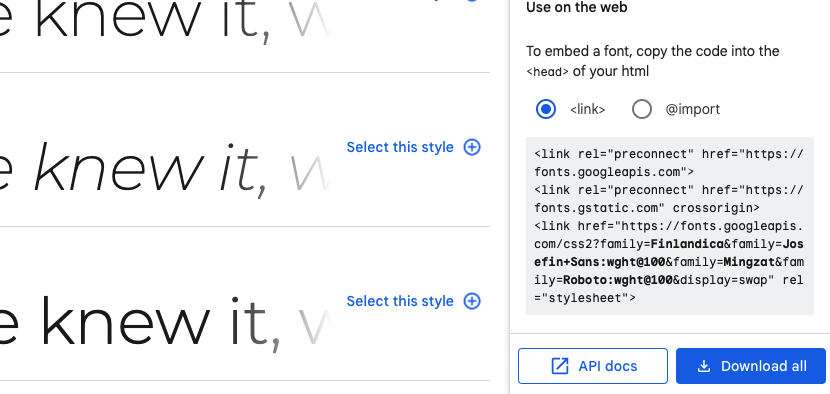
Go to Google Fonts and search for the specific font you like. For this tutorial, we will use Montserrat, a free Google Font. Select the style variants from thin (100) to bold (900). Copy the link provided by Google and past in between the Head tags.

import Document, { Html, Head, Main, NextScript } from "next/document";

function MyDocument() {
  return (
    <Html>
      <Head>
        <link
          href="https://fonts.googleapis.com/css2?family=Montserrat:wght@100;200&display=swap"
          rel="stylesheet"
        />
      </Head>
      <body>
        <Main />
        <NextScript />
      </body>
    </Html>
  );
}

export default MyDocument;
Now, it’s time to configure the tailwind.config.js file. Go to Add tailwind.config.js and add Montserrat as the font family for your app. Also remember to add defaulTheme for the app as shown below.
/** @type {import('tailwindcss').Config} */
const defaultTheme = require("tailwindcss/defaultTheme");

module.exports = {
  mode: "jit",
  purge: ["./pages/**/*.{js,ts,jsx,tsx}", "./components/**/*.{js,ts,jsx,tsx}"],
  darkMode: false, // or 'media' or 'class'
  theme: {
    extend: {
      fontFamily: {
        Montserrat: ["Montserrat", ...defaultTheme.fontFamily.sans],
      },
    },
  },
  variants: {
    extend: {},
  },
  plugins: [],
};
Start Using Custom Font
Go to your Components or Pages, in this case for simplicity we are using _app.js file to custom font. Add className=”font-fontname” to the element. The fontName here refers to the name we gave to the font family in the previous step in this case Montserrat.
import Head from "next/head";
import Image from "next/image";

export default function Home() {
  return (
    <div>
      <Head>
        <title>Create Next App</title>
        <meta name="description" content="Generated by create next app" />
        <link rel="icon" href="/favicon.ico" />
      </Head>

      <main>
        <h1 className="w-full text-center py-12 font-Montserrat text-3xl font-bold">
          Hello world! Im Montserrat Font
        </h1>
      </main>
    </div>
  );
}
Now you will be able to see the custom font you just added to your app.

Code is available on GitHub repo.

