
Introduction
In this tutorial, you will learn how to get start with Sanity.io for your next project. This tutorial will walk you through installing the necessary tooling, initiating project and starting the local development server for sanity studio. Before that lets understand what sanity.io is all about.
Sanity.io
Sanity.io is the platform for structured content that helps you to build better digital experience. Sanity provides you various features such as managing your text, image and other media files with the help of APIs libraries. Sanity studio offers rapid configuration and free form customization for its users. Using its plugins and toolkits you are able to create efficient workflows. With sanity CMS, now organizing and enhancing your content is easier than ever.
Getting started with Sanity
To begin with simply create a fresh project on your workplace, in this case sanity_backend type the following command on your terminal and let sanity do its thing. Basically this command is going to install a sanity cli globally and sanity init is going to setup a brand new sanity project for you.
npm install -g @sanity/cli && sanity initThe command-line tool is used to set up new projects, manage datasets, import data, and much more. We’ll be using it to get your project up and running.
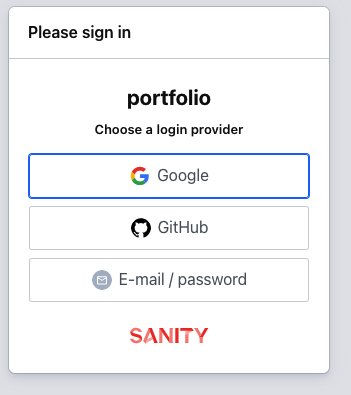
During the installation process, Sanity wants you to complete a successful login process. It will provide you various login options such as Google, Github and E-mail/Password. Once you complete the login process, it is going to redirect you to Sanity dashboard showing a successful login message on the screen.
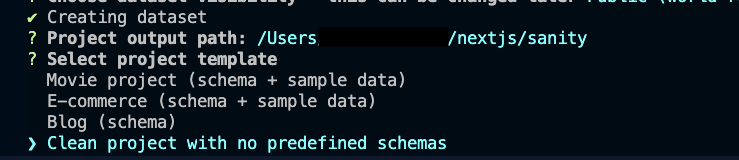
Now you can return back to terminal and create a fresh project by providing suitable name for your project. Press enter and you will get dataset configuration setup. You can choose default dataset configuration by pressing Yes and let it create a dataset config for your project.

Once you confirm your path it shows different project templates including blog, E-commerce and movie project.

Sanity provides you a lots of predefined project templates, however in this case we would like to choose a clean project with no predefine schemas.
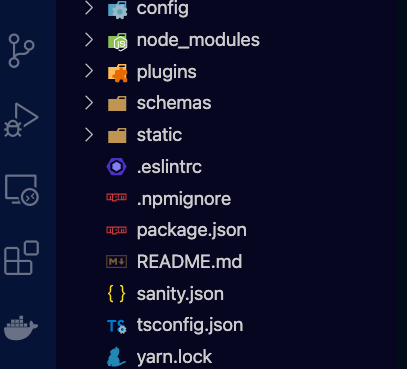
Write a name for your project on the terminal (in this case sanity_test). Once you press enter, it starts bootstrapping product files and dependencies for your project.
Conclusion
That’s it. Congrats if you made it through the entire tutorial. You’ve just successfully install Sanity CMS to your next project. Sanity is wonderful tool to power your static application such as a blog or e-commerce website.
I hope you find this article helpful. Thank you for reading. Happy Coding..!! 🙂