Hello everyone, today I am going to share my favorite Youtube channels to learn ReacJS from scratch. These channels are so popular and you might already know. If you are new to these youtube channel, then check out once and if you like the content subscribe for future videos.
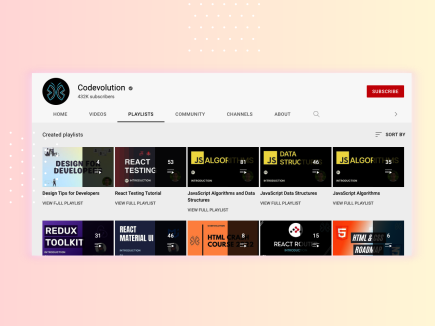
1. Codevolution
This channel has tutorials on various topics related programming. It contains large number of different kind of playlists regarding ReactJs covering almost all the topics that are beneficial for any developer who wants to master as ReactJS developer. The playlists cover beginner levels to more advance concept such as React router, React with Typescript and state management, Redux and etc.
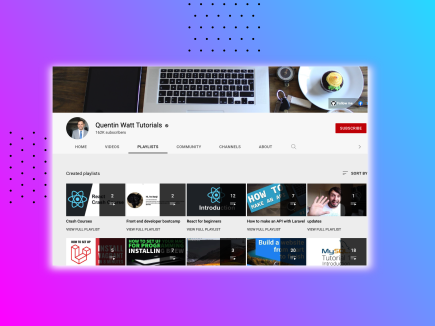
Creator of this channel Madhav, who has contributed a lot to the programming community and currently working as a Software Engineer at Microsoft. This channel teaches you React from beginner to advanced level by building projects. You can learn React from scratch, state management and React with Typescript by doing the projects on the channel.
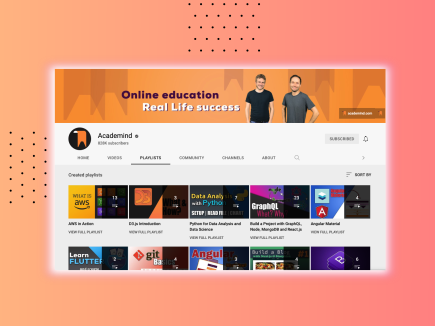
If you want to learn programming then this is a go to channel. It contains courses and tutorials that teach you everything related to web development. No matter if it’s programming languages like JavaScript, runtimes like NodeJS or popular frameworks like ReactJS, Angular or VueJS, this channel covers everything. Max is one of the creator of academind, probably best known for his Udemy courses which covers concept more in-depth and providing plenty of information related to programming.
freeCodeCamp.org have lengthy tutorials on various technologies. You’ll find videos on practically anything web development related, from React and JavaScript to Python, Machine Learning, Neural Networks, PenTesting, and more.
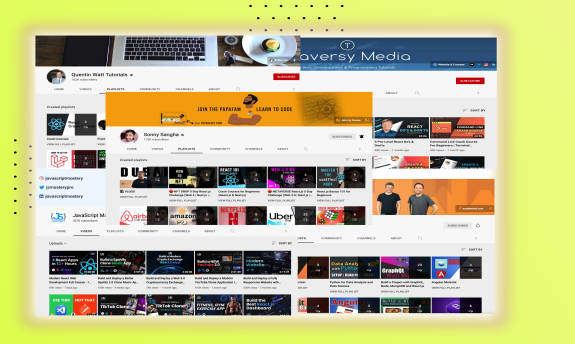
This is another useful channel you can find on Youtube. Brad Traversy created this channel aimed to provide web development and programming tutorials to everyone for free. You can find latest web technologies from the building blocks of HTML, CSS & JavaScript to frontend frameworks like React and Vue to backend technologies like Node.js, Python and PHP. These videos consists of both short and long videos. The long videos can go up to two hours. In his channel, you’ll find everything related to JavaScript.
Shaun Pelling is a creator of this YouTube channel and you can find videos on various areas includes JavaScript, HTML, Node.js, CSS, Python, Django, Angular, Vue, Git, React, MongoDB, Bootstrap, PHP, WordPress and more. This channel covers basic ReactJS concepts for beginners level to real projects with more advance concepts. You can learn how to develop ReactJs projects with APIs integration such as Firebase backend and Contentful headless CMS.
This channel is one of the best channels on YouTube if you want to learn anything related to programming. Simplilearn is an award-winning Bootcamp channel that has wide range of tutorials. The website and channel offer tutorials from experts and cover various topics, including data science, cyber security, and cloud computing, along with brushing up the basics in programming languages and coding.
This channel offers videos that help any learner to begin the journey with the React JS.
This channel is making easy to understand tutorials on front-end and mobile technologies using Javascript programming language. The instructor in this channel is a teacher knowing teaching skills and making complex stuffs easy to digest for new learners. The channel provides tips and tricks that help many developers to make their interviews easier.
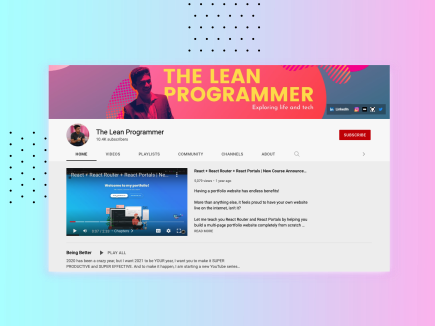
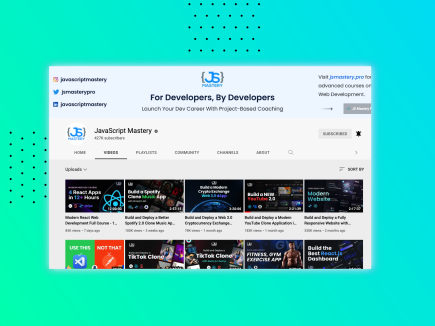
If you want improve your development career with project-based coaching, then this is a go-to channel. This channel helps to improve your skills with practical development experience by building or cloning real world applications. You will not regret to spend hours on this channel to learn new techs related stuffs.
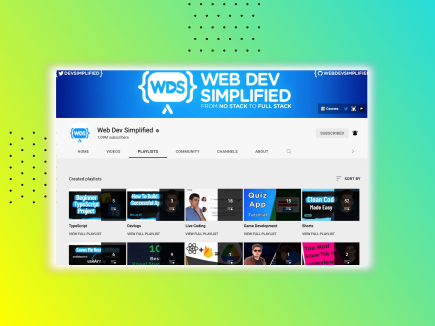
Web Dev Simplified is all about teaching web development skills and techniques in an efficient and practical manner. If you are just getting started in web development, Web Dev Simplified has all the tools you need to learn the newest and most popular technologies to convert you from a no stack to full stack developer. Web Dev Simplified also deep dives into advanced topics using the latest best practices for you seasoned web developers.
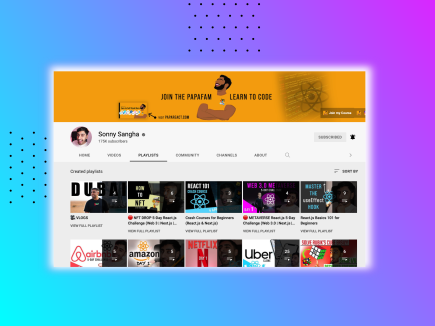
My current favorite channel for ReactJs. I simply love the way teaches complex topics such as state management and Typescript. He build clones which helps to learn new things much faster. Sonny will deliver a Full Stack Mastermind coaching call which many describe as ‘Worth more than a University Degree itself. His program, Zero to Full Stack Hero is constantly changing new developers lives.
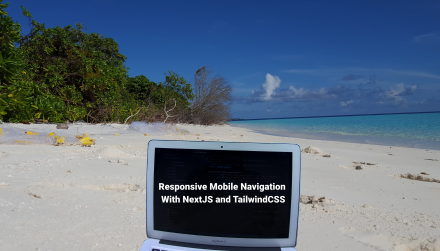
In this tutorial, we’ll be using Next.js and TailwindCSS to build a responsive global navigation bar for your next project. This tutorial will walk you through the steps to set up your project, create components and add a global navbar in Next.js project using TailwindCSS!
The goal of having a mobile navigation is to make sure that content is always at users’ fingertips as they browse your application regardless of the devices.
Next.js
Next.js is a framework that makes the creation of React apps extremely easy and efficient.
Next.js is an open-source development framework built on top of React.js. It is React based framework which have various functionalities to power up both server-side rendering and generating client side static websites.
Next.js gives you the best developer experience with all the features it present for any production ready apps. Features such as hybrid static & server rendering, TypeScript support, smart bundling, route pre-fetching give developers a seamless development experience.
You can learn more about Nextjs and its newest features here.
TailwindCSS
TailwindCSS is a utility-first CSS framework that helps you create responsive layouts and design systems with ease. TailwindCSS is utility-based low level CSS framework intended to ease building web applications much faster and more efficiently. TailwindCSS is so popular nowadays, because it helps build websites without ever leaving your HTML files.
The purpose of this post is to show how easy and intuitive it can be to make a responsive navbar in NextJS with the help of TailwindCSS. So let’s begin. Before we start writing some code, we need to do some initial configuration for tailwind and Nextjs.
Setup and Configuration
To start with, we need to install NextJS with NextCli, using npm or yarn. In our case we prefer to use npm. Start by creating a new Next.js project if you don’t have one set up already. Follow this tutorial for complete installation guide of Nextjs and TailwindCSS project.
Creating Pages
Next, create few pages for the application. We are having home, about, projects and contact page. In the pages folder we are going to create all the pages so we can call them inside the navebar. In addition, create a component called MenuItems.js. Using props we will pass showMenu function and active status.
Now create a components folder in your root directory, then create all the components in that folder. Create Header.js file inside this folder.
React useState hooks is used identify the current state of the menu bar. By default we let the menu bar for mobile hidden using active state false. We use a function named showMenu to hide and show the menu for respective devices.
Now it is time to install Material-ui icons using npm. To display the menu we are using a clickable button named MenuOutlined icon from material-ui icons. We use onClick property and then call showMenu function inside the MenuOutlined.
Now we have done our navbar. But it is important to use a common navbar in every page of our application. To make it simple we can import navbar in the root level file _app.js.
import "../styles/globals.css";
import Head from "next/head";

import Header from "../components/Header";

function MyApp({ Component, pageProps }) {
  return (
    <>
      <Head>
        <title>Navbar Example</title>
      </Head>
      <Header />
      <Component {...pageProps} />
    </>
  );
}

export default MyApp;
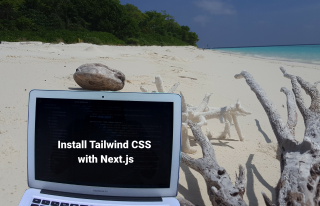
Setting up Tailwind CSS in a Next.js v10+ project.
This tutorial will walk you through the steps by steps to install and configure a Next.js project with TailwindCSS.
TailwindCSS
Tailwind is a utility-first CSS framework that provides a set of ready-to-use mixins, so it doesn’t require any of the usual CSS configuration. TailwindCSS is used for frontend styling, as it helps build websites without ever leaving your HTML files.
NextJS
Next.js is a minimalistic open-source framework for server-rendered React applications, built on top of ReactJs, allowing developers to create JavaScript applications that work both in the browser and in Node environments (e.g., server rendering).
Create your project
Create a new Next.js project using command line tool. You can use NextJs official documentation to create brand new Nextjs app.
npx create-next-app my-project
cd my-project
Install Tailwind CSS
Install TailwindCSS and its peer dependencies via npm. You can also use yarn instead of npm. Now run the init command as shown below to generate tailwind.config.js and postcss.config.js. These files are helpful when you want to configure more things regarding TailwindCSS for your application.
Add the paths to all of your template files in your tailwind.config.js file. You can use your own CSS, external packages and plugins in your project using tailwind.config.js.
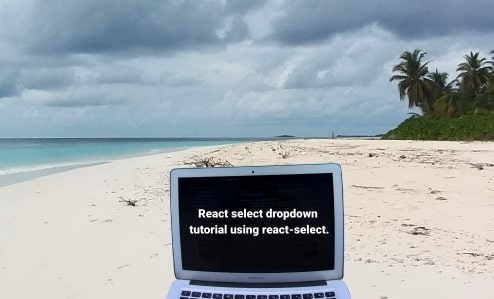
In this tutorial, you will learn how to use react-select library to create a dropdown selection in your React app. Before that, let’s first understand what React-select is and why should you use this library in your React.js project.
React-select
React-select is an easy to use dropdown library create by Jed Watson and few other awesome contributors. It is a powerful library, offers various features such as multi-select, autocomplete and many more. This is a perfect choice for your next Reactjs project, providing numerous dynamic functionalities to the dropdown components including search and filter functionality, animation, easy accessibility and faster loading time.
Features provided by React-select package include:
Flexible approach to data with customizable functions.
It handle large number of dataset.
Simple customization with API support.
Controllable state props and modular architecture.
Manage component state easily.
CSS styling with emotion support. Provide CSS animation support for components.
Long-requested features like option groups, portal support, animation, and more
Step 1: Install React and other libraries
Dependencies used for this project.
React-Select Library
TailwindCSS for CSS and styling (optional- you can use any styling library)
Run the following command to install a brand new React project. You can either use yarn or npm, but for this tutorial, npx is used. This will create a React app for us.
npx create-react-app react-select
Change the directory and get inside to the project folder. You can always clean the project just a little bit. Remove the files you do not required for this project.
cd react-select
Install Tailwind CSS
Install TailwindCSS and its peer dependencies via npm, and then run the init command to generate both tailwind.config.jsand postcss.config.js.
Start using Tailwind’s utility classes to style your content and it will reflects the changes you make to the app.
Install React-Select Library
Now, this is important step. We need to install React-select package. For that simply run the following command.
npm i react-select
Once it is installed, you can now import the react-select module any where in our project. For simplicity it is imported in src/App.js file.
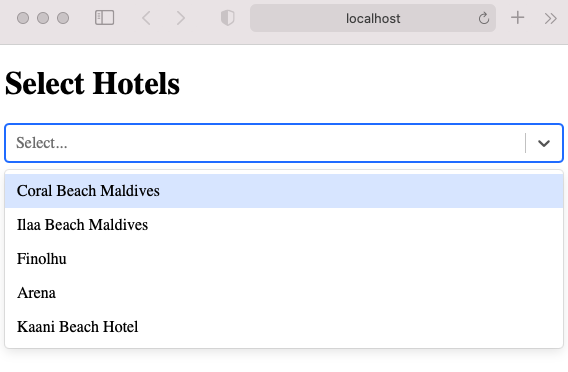
Now create a function that will handle our selected value. Name it setHandle and call it on the component. It will change the current value once user click to the dropdown.
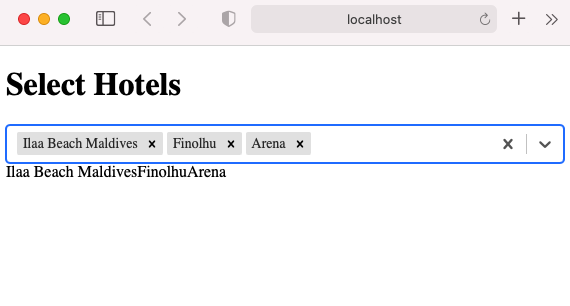
An array named Hotels is created, it then pass the hotel list to the dropdown. Hotel names is displayed when a user clicks on the dropdown and select element with the help of the react-select library.
There are many other properties available and common props you may want to specify include:
autoFocus – focus the control when it mounts
isDisabled – disable the control
isMulti – allow the user to select multiple values
isSearchable – allow the user to search for matching options
name – generate an HTML input with this name, containing the current value
onChange – subscribe to change events
options – specify the options the user can select from
placeholder – change the text displayed when no option is selected
React Multi Select Dropdown
Multi select option is one of the popular properties provided by this library. let us understand how this is used in a React project. It is actually very easy, simply you need to add isMulti prop to select various value in a select dropdown.
Tailwind CSS is a utility-first CSS framework which is used to make your website more responsive and beautiful. It is well known modern CSS frameworks which helps to speed up the development and styling process significantly. If you’re new to Tailwind CSS please follow the official documentation of Tailwind CSS and find a good starting point at the project’s homepage at TailwindCSS.
Setting up your React project with Tailwind CSS is so simple and comprises only very few steps. In this tutorial you will learn step-by-step approach of installing Tailwind CSS into your React project and get started using Tailwind’s CSS classes for styling.
Step 1: Creating Your React Project
Creating your new React.js project is the very first step. The easiest way to create a new project is to use the create-react-app script on the command line.
npx create-react-app react-app-with-tailwind
Now, cd into the working directory.
cd react-app-with-tailwind
If everything goes well, you should be able to see your react project on the web browser when you run the following command.
npm run start
Step 2: Install Tailwind CSS
Now install tailwindcss and its peer dependencies via npm, and then run the init command to generate both tailwind.config.js and postcss.config.js.
Tailwind will create two files. You need to make small changes so it will works well for our Reactjs project.
tailwind.config.js
postcss.config.js
Step 4: Configuring Template Files
You need to specify the path to our Reactjs project files by adding the following configuration setting inside tailwind.config.js. Make sure to add the paths to all of your template files in your tailwind.config.js file.
That’s all. You’re good to go! Let’s make use of Tailwind’s CSS classes within our main React component in App.js.
Step 6: Use Tailwind CSS In Your React App
Add the following code to App.js. Start the development web server by using the following command. Now you should be able to see the following result in the browser.
I was trying to use create-react-app but I got errors which doesn’t allow me to install new react project. The error is shown below:
If you've previously installed create-react-app globally via
npm install -g create-react-app, we recommend you uninstall
the package using npm uninstall -g create-react-app or yarn global
remove create-react-app to ensure that npx
This message could be even stated in the error message you received:
You are running create-react-app 4.0.0, which is behind the
latest release (4.0.1). We no longer support global installation
of Create React App.
Solution
You must uninstall create-react-app with npm uninstall -g create-react-app
Uninstall create-react-app v4.0.1
Globally, update npm, clear the cache, and retry creating the app. Use the command below.
Note: Some time this command alone will fix the issue.
Different versions of npm may also be helpful, and you may upgrade using the command below. Please keep in mind that this may have an impact on other projects on your system.
In this tutorial, you will learn how to get start with Sanity.io for your next project. This tutorial will walk you through installing the necessary tooling, initiating project and starting the local development server for sanity studio. Before that lets understand what sanity.io is all about.
Sanity.io
Sanity.io is the platform for structured content that helps you to build better digital experience. Sanity provides you various features such as managing your text, image and other media files with the help of APIs libraries. Sanity studio offers rapid configuration and free form customization for its users. Using its plugins and toolkits you are able to create efficient workflows. With sanity CMS, now organizing and enhancing your content is easier than ever.
Getting started with Sanity
To begin with simply create a fresh project on your workplace, in this case sanity_backend type the following command on your terminal and let sanity do its thing. Basically this command is going to install a sanity cli globally and sanity init is going to setup a brand new sanity project for you.
npm install -g @sanity/cli && sanity init
The command-line tool is used to set up new projects, manage datasets, import data, and much more. We’ll be using it to get your project up and running.
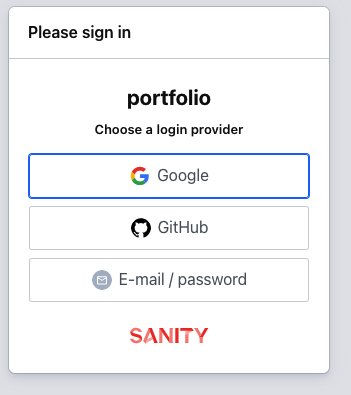
During the installation process, Sanity wants you to complete a successful login process. It will provide you various login options such as Google, Github and E-mail/Password. Once you complete the login process, it is going to redirect you to Sanity dashboard showing a successful login message on the screen.
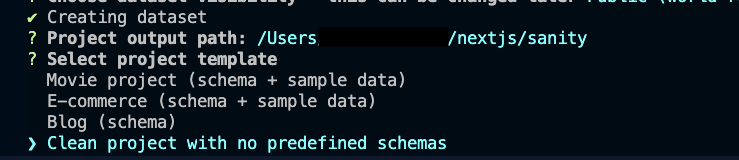
Now you can return back to terminal and create a fresh project by providing suitable name for your project. Press enter and you will get dataset configuration setup. You can choose default dataset configuration by pressing Yes and let it create a dataset config for your project.
Once you confirm your path it shows different project templates including blog, E-commerce and movie project.
Sanity provides you a lots of predefined project templates, however in this case we would like to choose a clean project with no predefine schemas.
Write a name for your project on the terminal (in this case sanity_test). Once you press enter, it starts bootstrapping product files and dependencies for your project.
Conclusion
That’s it. Congrats if you made it through the entire tutorial. You’ve just successfully install Sanity CMS to your next project. Sanity is wonderful tool to power your static application such as a blog or e-commerce website.
I hope you find this article helpful. Thank you for reading. Happy Coding..!! 🙂
After Covid-19, Pandemic and now Russia-Ukraine War, so many things happening unexpectedly😔 but thats another story lets focus on our topic for today.
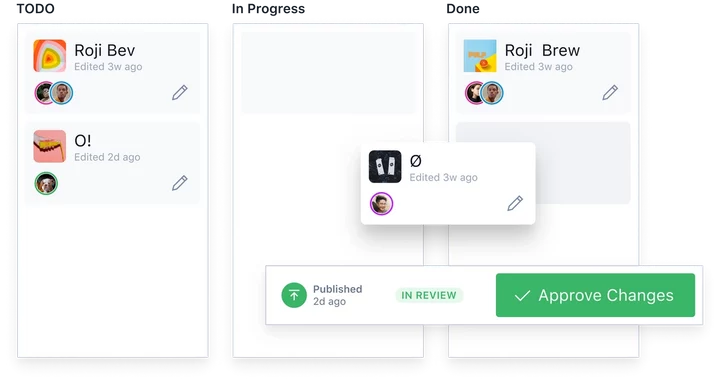
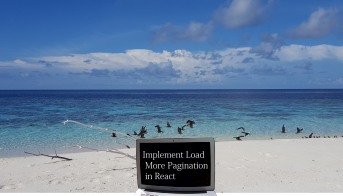
In this article, we will go through how to implement Load more functionality for your next React.js project.
Demo of what we are working on today…👇
Why we need Load more functionality?
For example, you have an e-commerce app and you may need to load products from Rest API or from any other backend database. If we only have 10 or 20 products, it will be easy to fetch them all in just one request. However, if you have hundred and thousands of products sometime even millions, you have to implement pagination to reduce the request hitting on the server. It is important to reduce latency and server load so that the app significantly improves the performance.
So if you want display so many data such as products list, items or blog posts on your web page then you need to implement pagination. For this reason we are learning how to implement basic Load more functionality for in this article. Keep in mind in this example, we will not use any server side rending rather fetch products locally for simplicity.
Steps to implement load more pagination in React
Create a Next.js app
Install TailwindCSS and Configuration
Design the app
Implement load more button functionality
Output
1. Create a Next.js app
Start by creating new Next.js project with TailwindCSS. The quickest way to start using Tailwind CSS in your Next.js project is to use the Next.js + Tailwind CSS Example.
npx create-next-app load-more
cd load-more
2. Install TailwindCSS and Configuration
Install tailwindcssand its peer dependencies via npm, and then run the init command to generate both tailwind.config.js and postcss.config.js.
Now let’s design the app. We will display list of groceries on the home page. Each product consists of item name, category and image. We will create few components and pages. We start with index.js page. This is main file for our app because it consists of <FreshProd /> component which is responsible to display all the products.
import Head from "next/head";
import Image from "next/image";
import Link from "next/link";
import FreshProd from "../components/FreshProd";

export default function Home() {
  return (
    <main className="container mx-auto px-8 sm:px-12">
      <section className="py-4">
        <div className="flex  items-center justify-between">
          <h2 className="text-md sm:text-2xl font-extrabold py-8">
            Stock Up on Fresh Favorites
          </h2>

          <Link href="/shop">
            <a className="text-base py-8 cursor-pointer text-black">See All</a>
          </Link>
        </div>
        <FreshProd />
      </section>
      <section className="py-4">
        <h2 className="text-2xl font-extrabold py-8">Recommended Products</h2>
        <FreshProd />
      </section>
    </main>
  );
}
As said before we will use all the data locally therefore we left all the data in FreshProd.js component as an object. All the images are also stored in images folder for simplicity. We will fetch data using an external APIs or maybe from firebase database later in another tutorial.
Now let’s try to write a function so that it display certain amount of products instead of displaying all the products on the screen. This is where we use Loadmore button and implement pagination on our app. In this case we want to display 6 products.
Lastly we slice the object, so in each time we press the button it will display 6 products on the screen. We use props to pass the data to Product component.
Thats it! Now we have implemented simple pagination or loadmore functionlity on our Next.js app project. We can improve this functionality and code but this is a good starting point.
One of the very first reasons to get up early when you’re beachside is to see beautiful sunrise. Today I spent time on beach area aiming to complete this article I started last night. This is a short article where I wrote about Next.js navigation and its implementation. So without further ado let’s jump into the topic.
Websites and web applications generally have more than one pages. But you may wondering, how to achieve routing in Next.js so users able to navigate between the pages. In this article, we’ll explore how to navigate between the pages but before that, first let’s look into the brief introduction of Next.js.
What is Next.js ?
In our previous article we have discussed about Next.js and its cool features in more in-depth. Next.js is an open-source development framework built on top of React.js. It is React based framework having various functionalities to power up both server-side rendering and generating client side static websites.
Next.js gives you amazing developer experience with all the features it provides for any production ready application. Features such as hybrid static & server rendering, TypeScript support, smart bundling, route pre-fetching give developers a seamless development experience.
Now, let’s explore how to add more pages to our application and how to manage page routing in Next.js.
In this article, we will learn:
Setup project in Next.js
Create pages
Use Link component to enable client-side navigation between pages.
1. Setup project in Next.js
We start with initial setup of the Next.js project. If this is the first time you are trying to create a project in Next.js then refer Nextjs official website where you get an extensive knowledge on Nextjs and its core functionalities.
To create a new app simply write the following command create-next-app, which sets up everything automatically for you. To create a project, run:
npx create-next-app@latest
# or
yarn create next-app
After installation is completed:
Run npm run dev or yarn dev to start the development server on http://localhost:3000
Visit http://localhost:3000 on your browser to view your application
2. Create pages
In Next.js, usually we create separate folder directory called pages. This folder consists of all the pages for the application. Pages are associated with the routes based on their file name. For example:
pages/index.js is associated with the / route.
const Index = () => <h1>Home page!</h1>
export default Index;
pages/about.js is associated with the /about.js route.
export default function About() {
  return <h1>About</h1>
}
3. Link component
Now we use next/link to enable the redirection between pages. To link different pages, we use <a> HTML tag. Next.js uses Link Component from next/link to wrap the <a> tag. <Link> allows you to do client-side navigation to a different page in the application.
To use Nextjs <Link>
First, open pages/index.js, and import the Link component from next/link by adding this line at the top:
In this example we create about us page only for simplicity. Therefore, open pages/about.js and start writing content. You can add rest of the pages later.
function about() {
  return (
    <div className="container mx-auto px-4 sm:px-12 py-12">
      <h1 className="text-xl font-medium">About</h1>
      <p className="text-md font-base py-12">
        is simply dummy text of the printing and typesetting industry. Lorem
        Ipsum has been the industry's standard dummy text ever since the 1500s,
        when an unknown printer took a galley of type and scrambled it to make a
        type specimen book. It has survived not only five centuries, but also
        the leap into electronic typesetting, remaining essentially unchanged.
        It was popularised in the 1960s with the release of Letraset sheets
        containing Lorem Ipsum passages, and more recently with desktop
        publishing software like Aldus PageMaker including versions of Lorem
        Ipsum.
      </p>
    </div>
  );
}

export default about;
Wrap Up
In this tutorial we learnt how to use Next.js link to navigate between different pages on the websites. Next.js comes with so many great features including Client-Side Navigation and Dynamic Navigation but in this example we have used client-side navigation using Link tag. Now linking pages in any Next.js website is easier than ever, Huge thanks to the Next.js team.
Demo
Full Code
You can get full code from my GitHub repository. Also this demo is deployed in Vercel. Have a look!
Visual Studio Code is undoubtedly the most popular code editor today. It is lightweight code editor developed by Microsoft for Windows, Linux and macOS. It includes various features such as syntax highlighting, debugging, intelligent code completion, snippets, embedded Git, code refactoring and many more. VS Code provides better performance and stability compared to other code editors in the market.
Microsoft has huge market place for VS Code where developers able to get third party plugins and extensions, availing VS Code more rich and efficient. Today we are discussing top 11 plugins for VS Code which provides invaluable to the speed and quality to your projects.
In this guide, we’ll explore the following extensions.
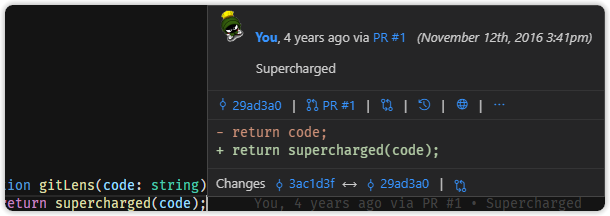
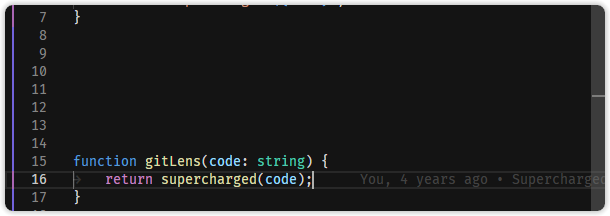
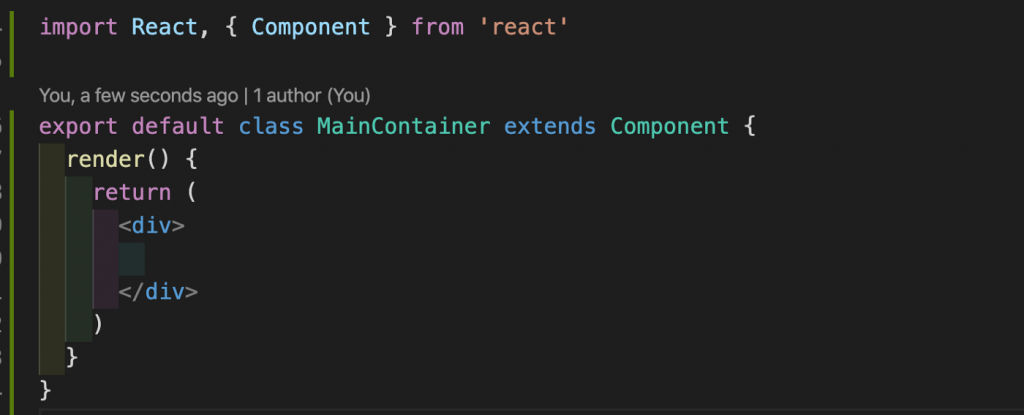
GitLens supercharges the Git capabilities. GitLens helps you to understand code better. This powerful and feature rich tool helps to quickly look into code changes such as who, why, and when a line or code block was changed. You are able to find code history to gain further insights as to how and why the code evolved. With this tools, you can effortlessly explore the history and evolution of a codebase.
Here are just some of the unique features GitLens provides,
Effortless revision navigation (backwards and forwards) through the history of a file
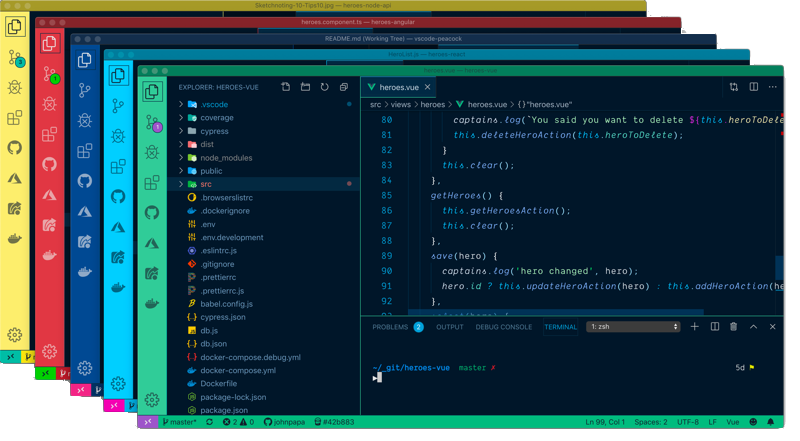
Developers love to open multiple windows of VS Code as they work on more than one projects at the same time. For example, both backend and front end project could be opened in two separate VS Code instances and developers might want move from one project to another. Using this extension developers able to change the color of each project windows, so that it can be quickly identify which project or repo they are working.
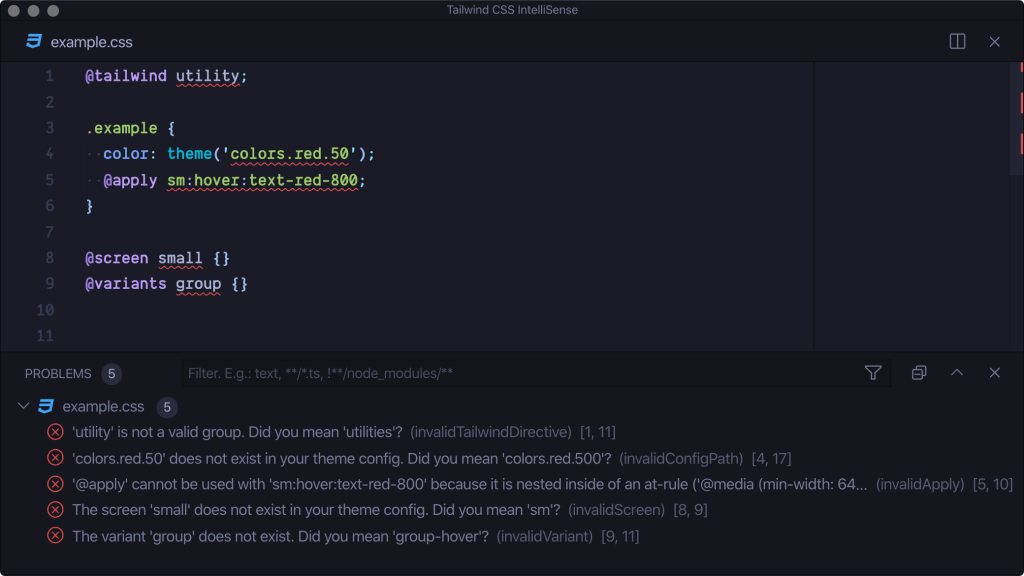
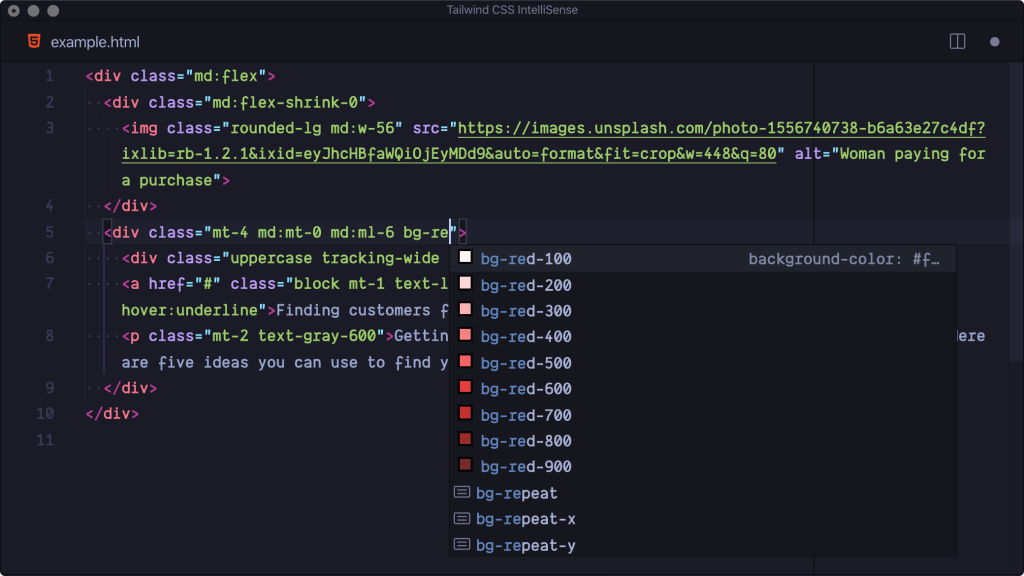
TailwindCSS is a utility-first CSS framework that has been gaining huge attention among the web developers. If you love Tailwind CSS then this is a must have extension to have. It is a free extension, published by Tailwind Labs (bradlc). This extension provides autocomplete, syntax highlighting, and linting for Tailwind classes. With this extension, developers don’t need to memorize the exact spelling of all the utility classes or to spend the time typing them out.
Linting highlights errors and potential bugs in both your CSS and your markup. It is the process of checking the source code for Programmatic as well as Stylistic errors.
In order for the extension to activate you must have tailwindcss installed and a Tailwind config file named tailwind.config.js or tailwind.config.cjs in your workspace.
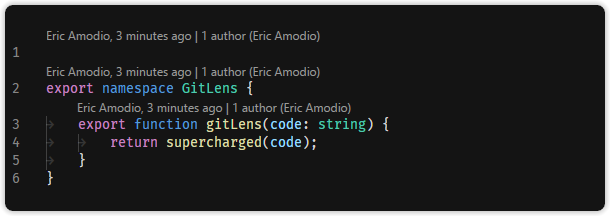
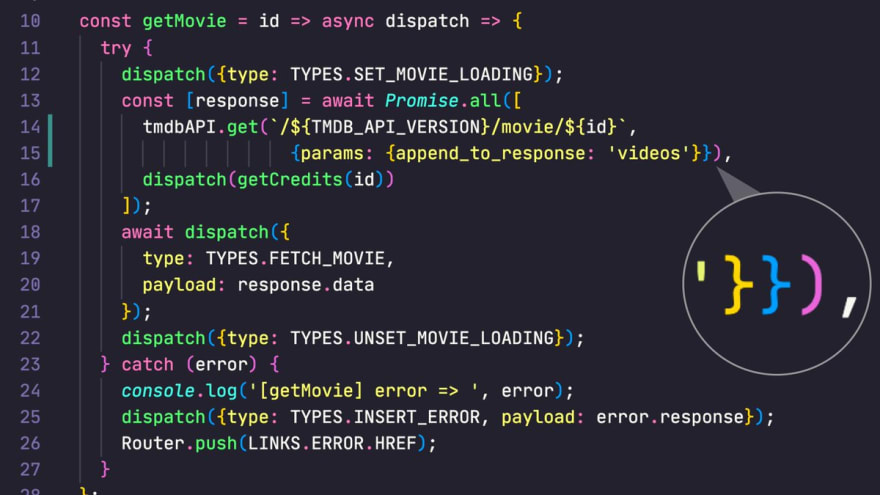
As our functions get more complex, it becomes more challenging to keep track of opening and closing brackets such as parentheses and curly braces.
We can use a VS Code extension called Bracket Pair Colorizer to add color to each set of opening and closing brackets, making it easier to identify each set of brackets.
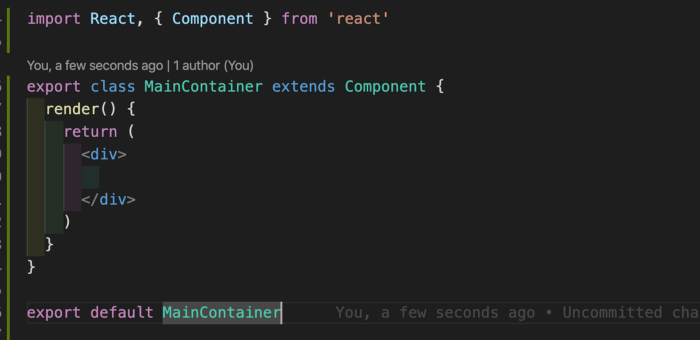
If you are a true React JS developer then this is a must have snippet for you, because it simply does just right for you. This plugin provides you JavaScript and React/Redux snippets in ES7 with Babel plugin features for VS Code.
Developers have different opinions on how to format the code structure so it would be readable. Prettier was created as a means of alleviating this challenge and ensures one unified code format within the development team.
Prettier reformats your JavaScript code consistently so that it make easy to read and understand the code. This plugin helps to format spacing, variable declarations, semi-colons, trailing commas and much more.
You can configure Prettier to format your files when saving them or committing them to a version control system (e.g. Git, SVN). This way, you do not have to worry about your source code formatting and Prettier takes care about it.
Most of the tags in HTML/XML need a corresponding closing tag. When writing large applications which consists of thousands and sometime millions of lines of code, the corresponding closing tags might located at very bottom of the editor, where developers has to scroll hundreds and thousand of lines below. It is tedious if you want to rename the tags.
Auto Rename Tag provides us with a feature that when we change the starting tag it will automatically rename paired HTML/XML tag, same as Visual Studio IDE does, making the renaming of tags easier.
You can simply install the plugin using VS code Extensions. After installation, Add entry into auto-rename-tag.activationOnLanguage to set the languages that the extension will be activated. By default, it is [“*”] and will be activated for all languages.
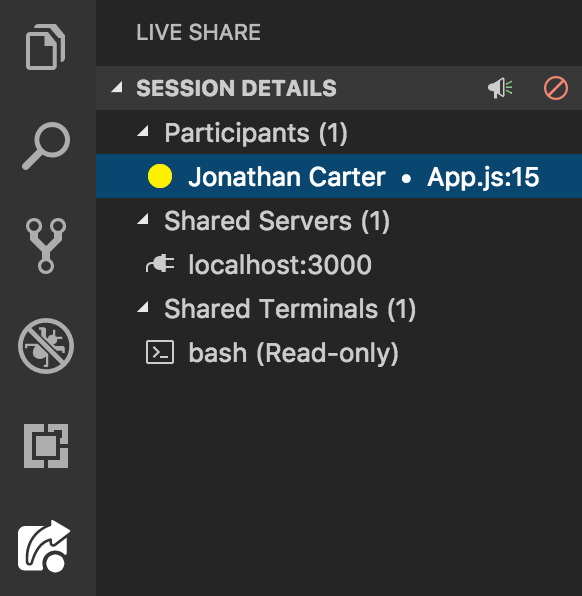
Another great contribution by Microsoft. Live Share enables you to collaboratively edit and debug code with other developers in real time. Using this tools, pair programming has become more convenient, where developers can instantly and securely share the project with other developers.
It shares all of their editor context meaning, other developers do not worry about cloning any repos or SDKs installation for code review and debugging process.
Download and install the Visual Studio Live Share extension for Visual Studio Code. If you want to integrated voice calling, then install the VS Live Share Extension Pack, which includes both the Live Share and Live Share Audio extensions.
Let Visual Studio Live Share to finish installing dependencies.
Once complete, you’ll see Live Share appear in your status bar. You can now begin collaborating with others immediately!
Quickstart (Joining)
Click the session URL the “host” sent you, which will open it up in a browser. When prompted, allow your browser to launch VS Code
You’ll be asked to sign in the first time you share (using a GitHub or Microsoft account), which allows others to identity you when collaborating.
That’s it! After you join, you’ll be immediately presented with the file that the “host” has open, and can see their cursor and any edits they make.
Additionally, you start out “following” the host, so as they scroll or navigate between files, you’ll follow along with them. This makes it easy to orient yourself with the issue/question/task you’re about to start collaborating on.
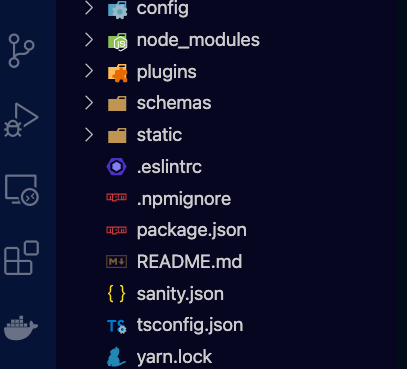
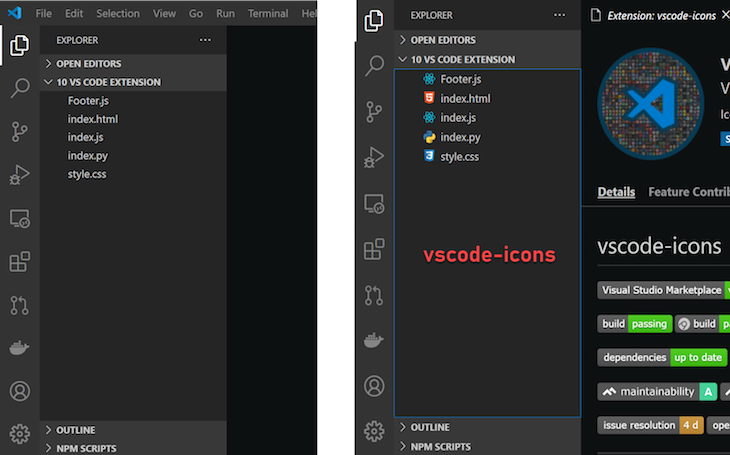
Having descriptive icons help you differentiate between files and folders in the project. Having icons in your project make more interesting and attractive. Below diagram depict different between two VS Code tabs with One having icons, the other does not.
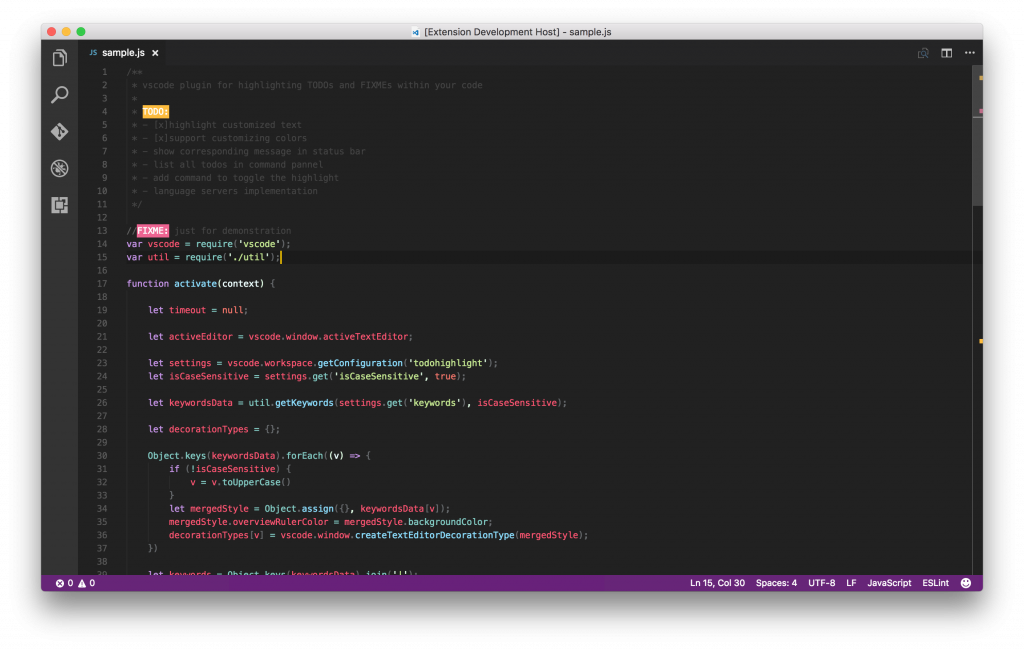
This plugin lets you to highlight TODO, FIXME and other annotations within your code. This is really a useful plugin for highlighting comments such as NOTE: , TODO: , DEBUG:. The customization settings are also quite extensive making it perfect for the developer, thus leading level up your comments on any project.
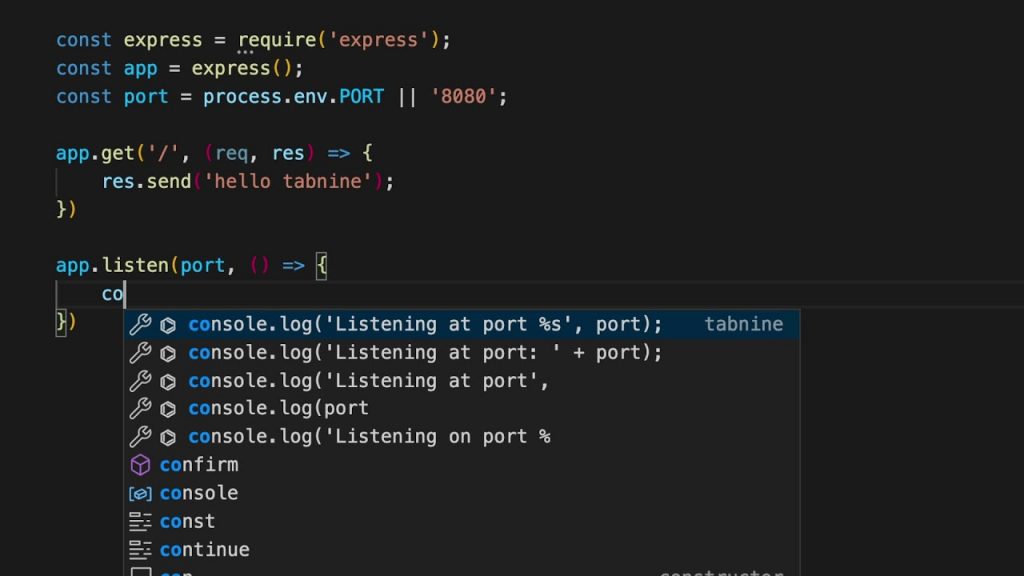
Tabnine is the AI code completion assistant already trusted by millions of developers to amplify coding accuracy and boost productivity. Whether you are a new dev or a seasoned pro, working solo or part of a team, Tabnine AI assistant will suggest team-tailored code completions in most popular coding languages and all your favorite IDEs.
Tabnine is powered by sophisticated machine learning models. It is trained on more than a billion lines of open-source code from GitHub.
Tabnine suggests and predicts code as you write. This powerful extension speed up your development, save you tons of time and cutting your coding time in half. Currently it support almost all the popular programming languages including Python, Javascript, Java and React.
Tabnine’s Team Learning Algorithm studies your team’s code, preferences, and patterns, continuously learning and adapting. Every interaction with a team member amplifies code completion accuracy.
Installation and Configuration
Press Cmd+P (mac) or Ctrl+P (Windows) in your Visual Studio Code, type ext install Tabnine.tabnine-vscode and press Enter
Click the Reload button in the extensions tab
The default behavior of Tabnine uses the Enter key to accept completions. If you would rather use the Enter key to start a new line, go to Settings → Editor: Accept Suggestion On Enter and turn it off.
Conclusion
In this article, we reviewed 11 VS Code extensions that can help to make you a better programmer and boost your productivity. There are many more other cool extensions that we need to explore in future, so If we have time then will definitely look into those extensions in the coming articles.