Tag Archives: TailwindCSS

Responsive Mobile Navigation With NextJS and TailwindCSS

Responsive Mobile Navigation With NextJS and TailwindCSS

In this tutorial, we’ll be using Next.js and TailwindCSS to build a responsive global navigation bar for your next project. This tutorial will walk you through the steps to set up your project, create components and add a global navbar in Next.js project using TailwindCSS!

The goal of having a mobile navigation is to make sure that content is always at users’ fingertips as they browse your application regardless of the devices.

Next.js

Next.js is a framework that makes the creation of React apps extremely easy and efficient.

Next.js is an open-source development framework built on top of React.js. It is React based framework which have various functionalities to power up both server-side rendering and generating client side static websites.

Next.js gives you the best developer experience with all the features it present for any production ready apps. Features such as hybrid static & server rendering, TypeScript support, smart bundling, route pre-fetching give developers a seamless development experience.

You can learn more about Nextjs and its newest features here.

TailwindCSS

TailwindCSS is a utility-first CSS framework that helps you create responsive layouts and design systems with ease. TailwindCSS is utility-based low level CSS framework intended to ease building web applications much faster and more efficiently. TailwindCSS is so popular nowadays, because it helps build websites without ever leaving your HTML files.

The purpose of this post is to show how easy and intuitive it can be to make a responsive navbar in NextJS with the help of TailwindCSS. So let’s begin. Before we start writing some code, we need to do some initial configuration for tailwind and Nextjs.

Setup and Configuration

To start with, we need to install NextJS with NextCli, using npm or yarn. In our case we prefer to use npm. Start by creating a new Next.js project if you don’t have one set up already. Follow this tutorial for complete installation guide of Nextjs and TailwindCSS project.

Creating Pages

Next, create few pages for the application. We are having home, about, projects and contact page. In the pages folder we are going to create all the pages so we can call them inside the navebar. In addition, create a component called MenuItems.js. Using props we will pass showMenu function and active status.

const MenuItems = ({ showMenu, active }) => {
  return (
    <ul
      className={
        active
          ? "flex-col flex items-center fixed inset-0 left-1/4 uppercase bg-black/40 backdrop-blur-lg gap-8 justify-center p-8 md:hidden"
          : "hidden"
      }
    >
      <Close onClick={showMenu} className="cursor-pointer" />
      <li>
        <Link href="/">
          <a>Home</a>
        </Link>
      </li>
      <li>
        <Link href="/projects">
          <a>Projects</a>
        </Link>
      </li>

      <li>
        <Link href="/about">
          <a>About</a>
        </Link>
      </li>
      <li>
        <Link href="/contact">
          <a>Contact</a>
        </Link>
      </li>
    </ul>
  );
};

Building Our Navbar

Now create a components folder in your root directory, then create all the components in that folder. Create Header.js file inside this folder.

React useState hooks is used identify the current state of the menu bar. By default we let the menu bar for mobile hidden using active state false. We use a function named showMenu to hide and show the menu for respective devices.

function Header() {
  const [active, setActive] = useState(false);

  const showMenu = () => {
    setActive(!active);
  };

Now it is time to install Material-ui icons using npm. To display the menu we are using a clickable button named MenuOutlined icon from material-ui icons. We use onClick property and then call showMenu function inside the MenuOutlined.

<nav>
    <div className="absolute right-6 md:hidden top-6 scale-150">
      <MenuOutlined
        onClick={showMenu}
        className="scale-150 cursor-pointer"
      />
    </div>

    <ul className="hidden md:flex gap-8 p-6 uppercase bg-white/10">
      <li>
        <Link href="/">
          <a>Home</a>
        </Link>
      </li>
      <li>
        <Link href="/">
          <a>Testimonials</a>
        </Link>
      </li>
      <li>
        <Link href="/">
          <a>Information</a>
        </Link>
      </li>

      <li>
        <Link href="/about">
          <a>About</a>
        </Link>
      </li>
      <li>
        <Link href="/contact">
          <a>Contact</a>
        </Link>
      </li>
    </ul>

    <MenuItems showMenu={showMenu} active={active} />
</nav>

Making Navbar Appear on All Pages

Now we have done our navbar. But it is important to use a common navbar in every page of our application. To make it simple we can import navbar in the root level file _app.js.

import "../styles/globals.css";
import Head from "next/head";

import Header from "../components/Header";

function MyApp({ Component, pageProps }) {
  return (
    <>
      <Head>
        <title>Navbar Example</title>
      </Head>
      <Header />
      <Component {...pageProps} />
    </>
  );
}

export default MyApp;

Now you have a working responsive navbar.

You can have full code here. Thanks for reading!

How to Add Custom Fonts to NextJS and Tailwind CSS Application

Add Custom Fonts to NextJS and Tailwind CSS Application

Tailwind CSS offers powerful capabilities to build visually appealing websites in a short time frame. To give your website a unique look and feel, you can choose to add custom fonts to NextJS project using Tailwind configuration.

Setting up a custom font in Next.js using Tailwind CSS is fairly easy. It needs 3 easy steps.

  • Installation and setting up _document.js
  • Declaring custom font family in tailwind.config.js
  • Using it in your components and pages.

For this tutorial, we will use Montserrat, a free Google Font. So let us begin installation process.

Create Your NextJs Project

The quickest way to start using Tailwind CSS in your Next.js project is to use the Next.js + Tailwind CSS Example. This will automatically configure your Tailwind setup based on the official Next.js example. If you’d like to configure Tailwind manually, continue with the rest of this guide.

Create your project

Start by creating a new Next.js project if you don’t have one set up already. The most common approach is to use Create Next App.

npx create-next-app nextjs-tailwind-tips
cd nextjs-tailwind-tips

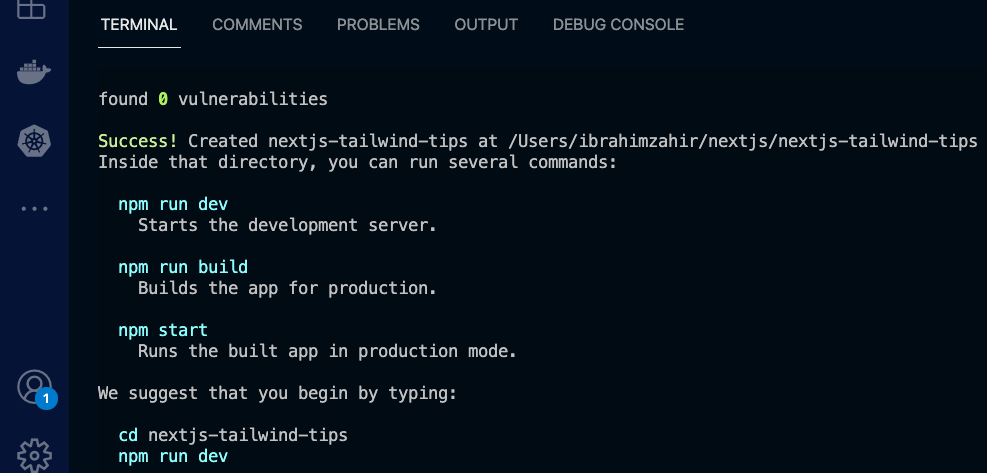
If everything has goes well, you will see something like this on your terminal.

Install Tailwind CSS

Install tailwindcss and its peer dependencies via npm, and then run the init command to generate both tailwind.config.js and postcss.config.js.

npm install -D tailwindcss postcss autoprefixer
npx tailwindcss init -p

Configure your template paths

Add the paths to all of your template files in your tailwind.config.js file.

module.exports = {
  content: [
    "./pages/**/*.{js,ts,jsx,tsx}",
    "./components/**/*.{js,ts,jsx,tsx}",
  ],
  theme: {
    extend: {},
  },
  plugins: [],
}

Add the Tailwind directives to your CSS

Add the @tailwind directives for each of Tailwind’s layers to your ./styles/globals.css file.

@tailwind base;
@tailwind components;
@tailwind utilities;

Add Google Font to _document.js File

A custom Document can update the <html> and <body> tags used to render a Page. This file is only rendered on the server, so event handlers like onClick cannot be used in _document.

To override the default Document create a new custom document file _document.js in your pages folder next-project/pages/ and set it up with the following code:

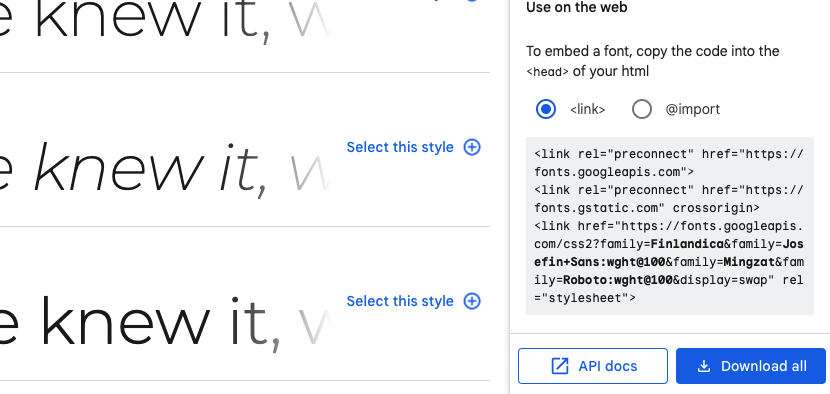
Go to Google Fonts and search for the specific font you like. For this tutorial, we will use Montserrat, a free Google Font. Select the style variants from thin (100) to bold (900). Copy the link provided by Google and past in between the Head tags.

import Document, { Html, Head, Main, NextScript } from "next/document";

function MyDocument() {
  return (
    <Html>
      <Head>
        <link
          href="https://fonts.googleapis.com/css2?family=Montserrat:wght@100;200&display=swap"
          rel="stylesheet"
        />
      </Head>
      <body>
        <Main />
        <NextScript />
      </body>
    </Html>
  );
}

export default MyDocument;

Now, it’s time to configure the tailwind.config.js file. Go to Add tailwind.config.js and add Montserrat as the font family for your app. Also remember to add defaulTheme for the app as shown below.

/** @type {import('tailwindcss').Config} */
const defaultTheme = require("tailwindcss/defaultTheme");

module.exports = {
  mode: "jit",
  purge: ["./pages/**/*.{js,ts,jsx,tsx}", "./components/**/*.{js,ts,jsx,tsx}"],
  darkMode: false, // or 'media' or 'class'
  theme: {
    extend: {
      fontFamily: {
        Montserrat: ["Montserrat", ...defaultTheme.fontFamily.sans],
      },
    },
  },
  variants: {
    extend: {},
  },
  plugins: [],
};

Start Using Custom Font

Go to your Components or Pages, in this case for simplicity we are using _app.js file to custom font. Add className=”font-fontname” to the element. The fontName here refers to the name we gave to the font family in the previous step in this case Montserrat.

import Head from "next/head";
import Image from "next/image";

export default function Home() {
  return (
    <div>
      <Head>
        <title>Create Next App</title>
        <meta name="description" content="Generated by create next app" />
        <link rel="icon" href="/favicon.ico" />
      </Head>

      <main>
        <h1 className="w-full text-center py-12 font-Montserrat text-3xl font-bold">
          Hello world! Im Montserrat Font
        </h1>
      </main>
    </div>
  );
}

Now you will be able to see the custom font you just added to your app.

Code is available on GitHub repo.

How to Build a Multiselect Dropdown Component Using React-select

React select dropdown tutorial using react-select. (1)

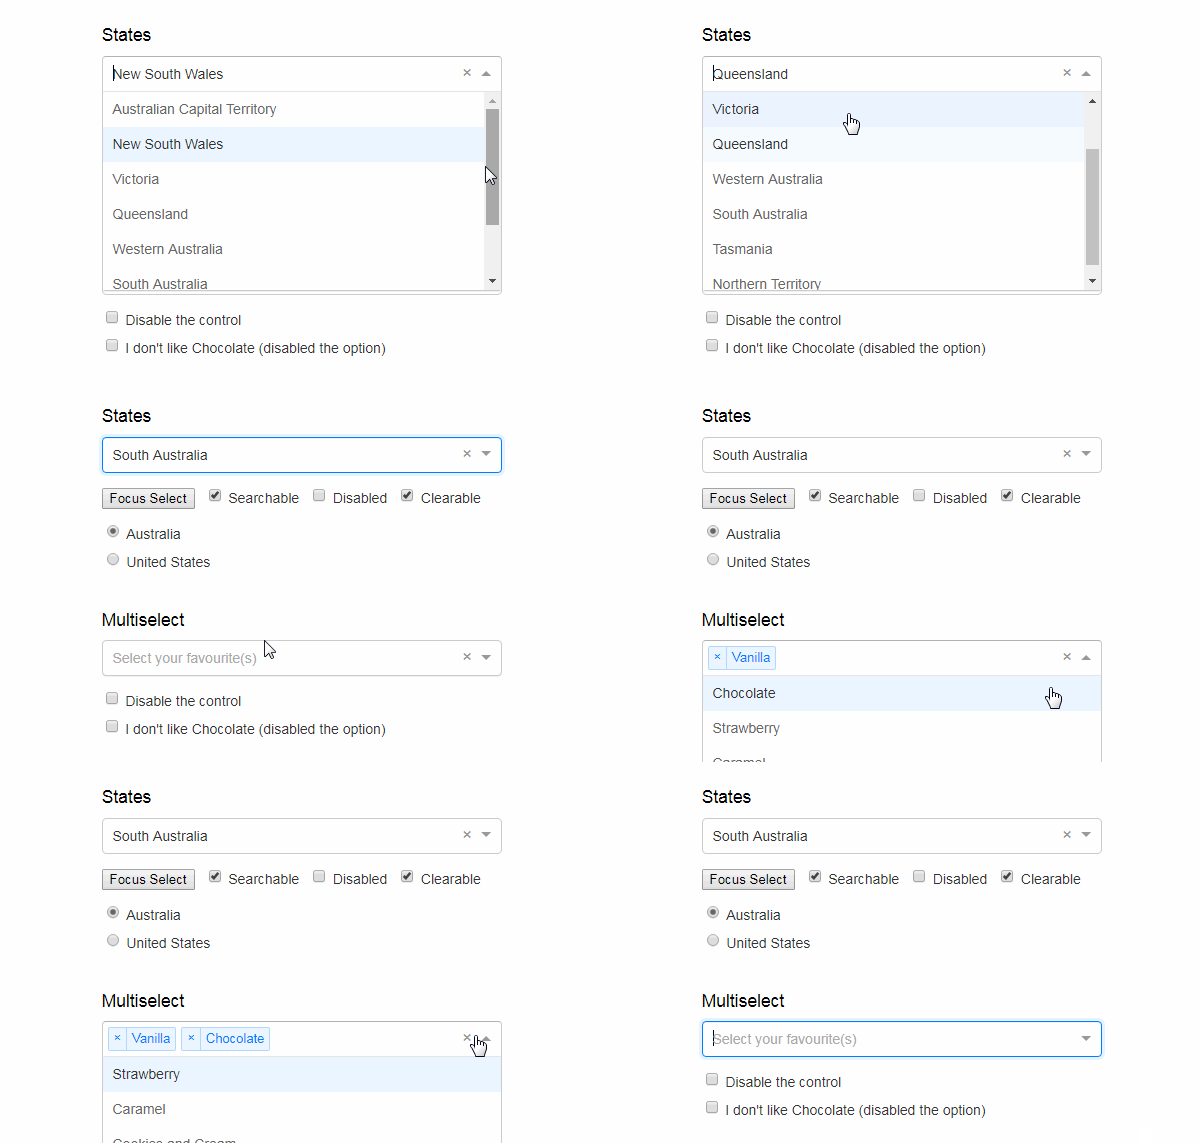
In this tutorial, you will learn how to use react-select library to create a dropdown selection in your React app. Before that, let’s first understand what React-select is and why should you use this library in your React.js project.

React-select

React-select is an easy to use dropdown library create by Jed Watson and few other awesome contributors. It is a powerful library, offers various features such as multi-select, autocomplete and many more. This is a perfect choice for your next Reactjs project, providing numerous dynamic functionalities to the dropdown components including search and filter functionality, animation, easy accessibility and faster loading time.

Features provided by React-select package include:

  • Flexible approach to data with customizable functions.
  • It handle large number of dataset.
  • Simple customization with API support.
  • Controllable state props and modular architecture.
  • Manage component state easily.
  • CSS styling with emotion support. Provide CSS animation support for components.
  • Long-requested features like option groups, portal support, animation, and more

Step 1: Install React and other libraries

Dependencies used for this project.

  • React-Select Library
  • TailwindCSS for CSS and styling (optional- you can use any styling library)

Run the following command to install a brand new React project. You can either use yarn or npm, but for this tutorial, npx is used. This will create a React app for us.

npx create-react-app react-select

Change the directory and get inside to the project folder. You can always clean the project just a little bit. Remove the files you do not required for this project.

cd react-select

Install Tailwind CSS

Install TailwindCSS and its peer dependencies via npm, and then run the init command to generate both tailwind.config.jsand postcss.config.js.

npm install -D tailwindcss postcss autoprefixer
npx tailwindcss init -p

Configure your template paths

Add the paths to all of your template files in your tailwind.config.jsfile.

module.exports = {
  content: [
    "./src/**/*.{js,jsx,ts,tsx}",
  ],
  theme: {
    extend: {},
  },
  plugins: [],
}

Add the Tailwind directives to your CSS

Add the @tailwinddirectives for each of Tailwind’s layers to your ./src/index.cssfile.

@tailwind base;
@tailwind components;
@tailwind utilities;

Start using Tailwind in your project

Start using Tailwind’s utility classes to style your content and it will reflects the changes you make to the app.

Install React-Select Library

Now, this is important step. We need to install React-select package. For that simply run the following command.

npm i react-select

Once it is installed, you can now import the react-select module any where in our project. For simplicity it is imported in src/App.js file.

Now create a function that will handle our selected value. Name it setHandle and call it on the component. It will change the current value once user click to the dropdown.

import "./App.css";
import React, { useState, Component } from "react";
import Select from "react-select";

const Hotels = [
  { value: 1, label: "Coral Beach Maldives" },
  { value: 2, label: "Ilaa Beach Maldives" },
  { value: 3, label: "Finolhu" },
  { value: 4, label: "Arena" },
  { value: 5, label: "Kaani Beach Hotel" },
];

function App() {
  const [selectedOptions, setSelectedOptions] = useState(null);

  const setHandle = (e) => {
    setSelectedOptions(Array.isArray(e) ? e.map((hotel) => hotel.label) : []);
  };

  return (
    <div className="mx-auto container py-8">
      <h1 className="text-sm">Select Hotels</h1>
      <div className="flex flex-wrap items-center lg:justify-between justify-center">
        <div className=" px-2	">
          <Select options={Hotels} onChange={setHandle} isMulti />
        </div>
        <div>{selectedOptions}</div>
      </div>
    </div>
  );
}

export default App;

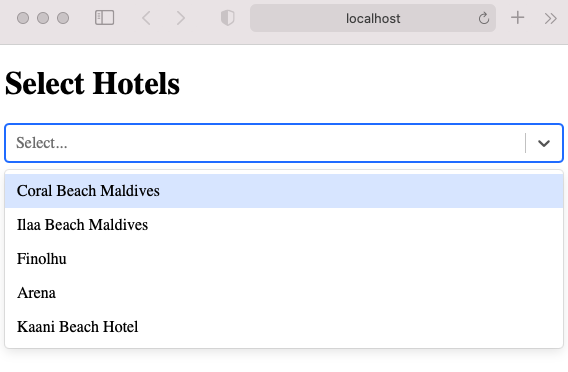
An array named Hotels is created, it then pass the hotel list to the dropdown. Hotel names is displayed when a user clicks on the dropdown and select element with the help of the react-select library.

There are many other properties available and common props you may want to specify include:

  • autoFocus – focus the control when it mounts
  • isDisabled – disable the control
  • isMulti – allow the user to select multiple values
  • isSearchable – allow the user to search for matching options
  • name – generate an HTML input with this name, containing the current value
  • onChange – subscribe to change events
  • options – specify the options the user can select from
  • placeholder – change the text displayed when no option is selected

React Multi Select Dropdown

Multi select option is one of the popular properties provided by this library. let us understand how this is used in a React project. It is actually very easy, simply you need to add isMulti prop to select various value in a select dropdown.

<Select options={Hotels} onChange={selHandle} isMulti />

Thats all for now! You can find code for this tutorial in this GitHub repo

How to Add Tailwind CSS to Your Reactjs Project

Tailwind CSS to ReactJS project

Tailwind CSS is a utility-first CSS framework which is used to make your website more responsive and beautiful. It is well known modern CSS frameworks which helps to speed up the development and styling process significantly. If you’re new to Tailwind CSS please follow the official documentation of Tailwind CSS and find a good starting point at the project’s homepage at TailwindCSS.

Setting up your React project with Tailwind CSS is so simple and comprises only very few steps. In this tutorial you will learn step-by-step approach of installing Tailwind CSS into your React project and get started using Tailwind’s CSS classes for styling.

Step 1: Creating Your React Project

Creating your new React.js project is the very first step. The easiest way to create a new project is to use the create-react-app script on the command line.

npx create-react-app react-app-with-tailwind

Now, cd into the working directory.

cd react-app-with-tailwind

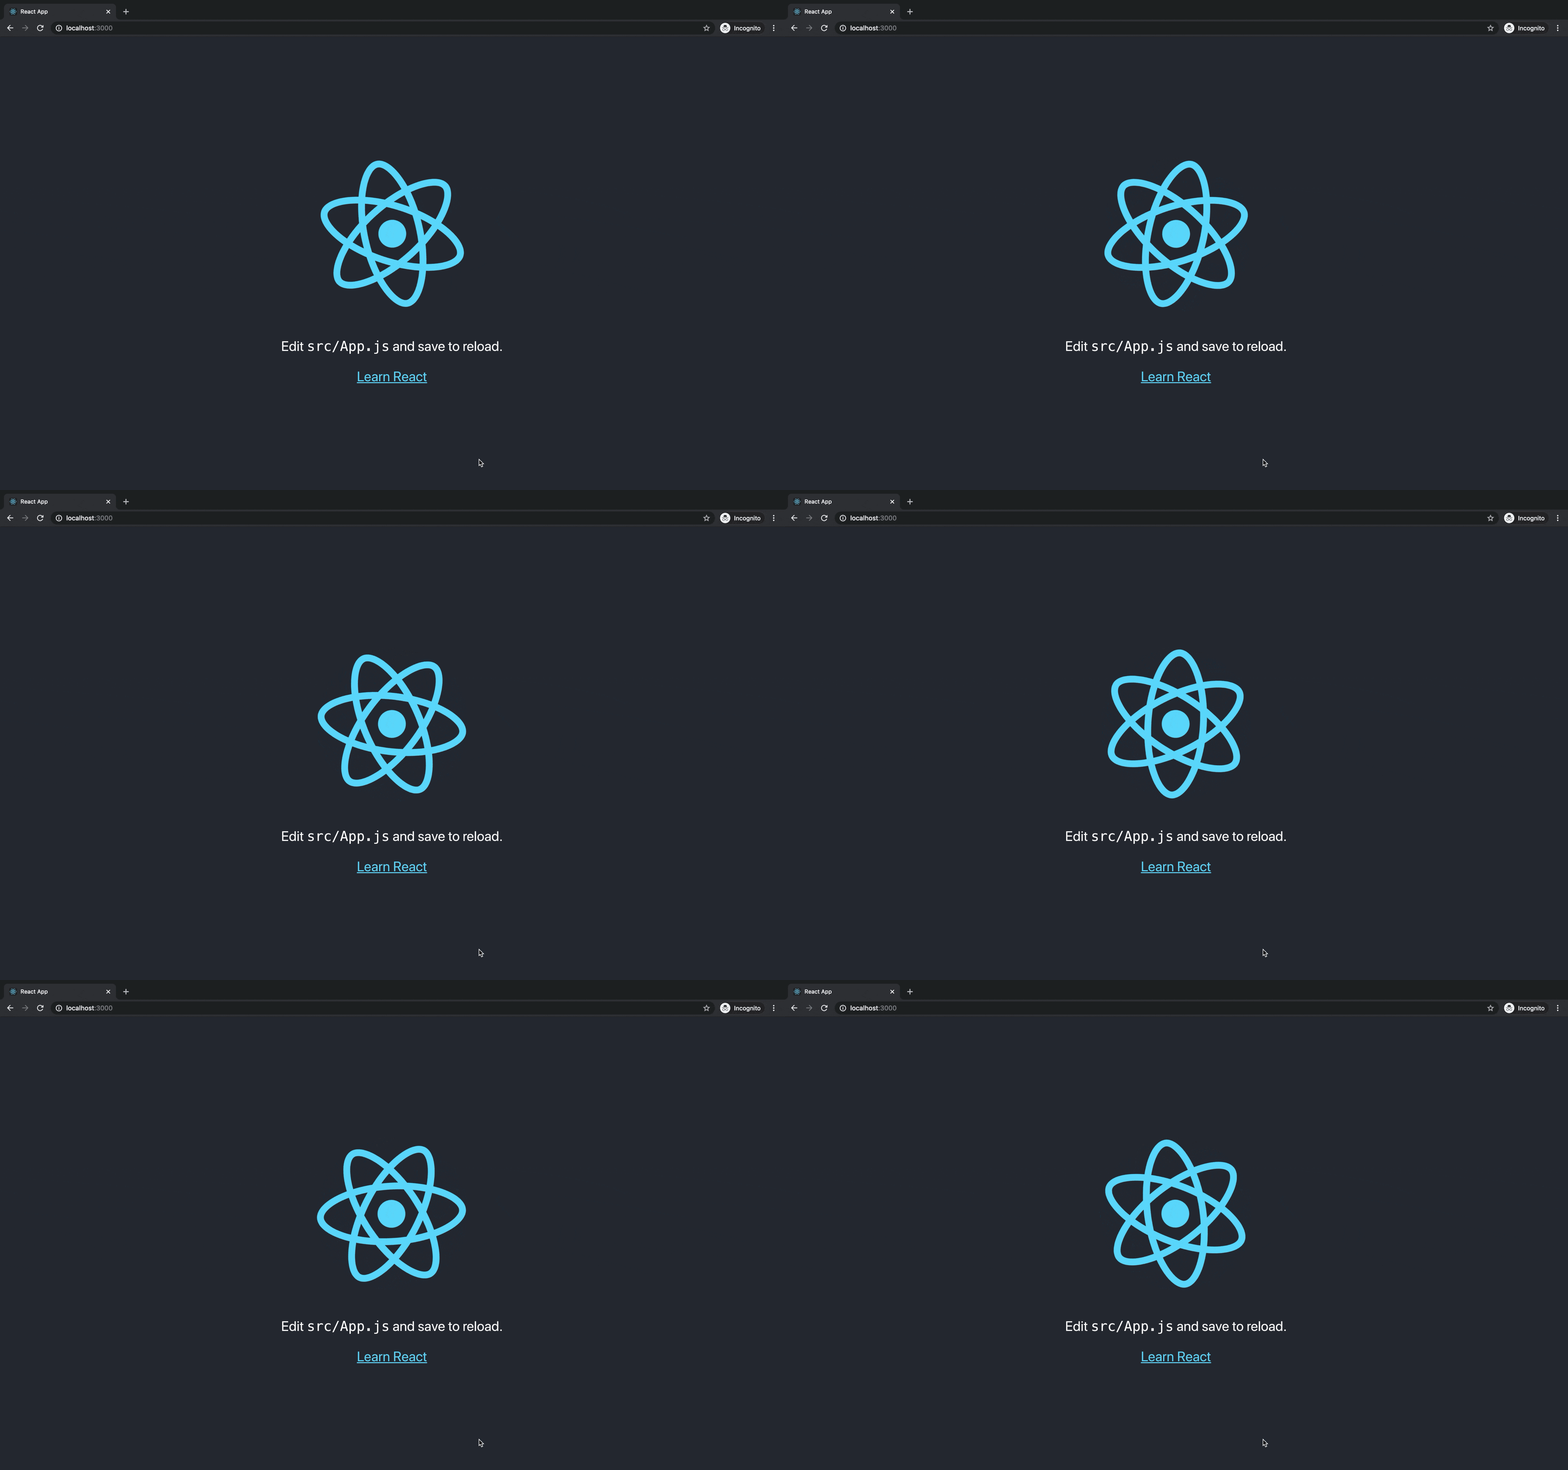
If everything goes well, you should be able to see your react project on the web browser when you run the following command.  

npm run start

Step 2: Install Tailwind CSS

Now install tailwindcss and its peer dependencies via npm, and then run the init command to generate both tailwind.config.js and postcss.config.js.

npm install -D tailwindcss postcss autoprefixer
npx tailwindcss init -p

Tailwind will create two files. You need to make small changes so it will works well for our Reactjs project.

  • tailwind.config.js
  • postcss.config.js

Step 4: Configuring Template Files

You need to specify the path to our Reactjs project files by adding the following configuration setting inside tailwind.config.js. Make sure to add the paths to all of your template files in your tailwind.config.js file.

module.exports = {
   content: [
     "./src/**/*.{js,jsx,ts,tsx}",
   ],
   theme: {
     extend: {},
   },
   plugins: [],
 }

Step 5: Add the Tailwind directives to your CSS

Now add the @tailwinddirectives for each of Tailwind’s layers to your ./src/index.css file.

@tailwind base;
@tailwind components;
@tailwind utilities;

That’s all. You’re good to go! Let’s make use of Tailwind’s CSS classes within our main React component in App.js.

Step 6: Use Tailwind CSS In Your React App

Add the following code to App.js. Start the development web server by using the following command. Now you should be able to see the following result in the browser.

<div className="container mx-auto bg-gray-200 rounded-xl shadow border p-8 m-10">
      <p className="text-3xl text-gray-700 font-bold mb-5">
        Welcome!
      </p>
      <p className="text-gray-500 text-lg">
        React and Tailwind CSS in action
      </p>
    </div>
npm run start

You can find code for this tutorial in this GitHub repo

Implement Load More Pagination in React

Implement Load More Pagination in React

Introduction

After Covid-19, Pandemic and now Russia-Ukraine War, so many things happening unexpectedly😔  but thats another story lets focus on our topic for today.

In this article, we will go through how to implement Load more functionality for your next React.js project.

Demo of what we are working on today…👇


Why we need Load more functionality?


For example, you have an e-commerce app and you may need to load products from Rest API or from any other backend database. If we only have 10 or 20 products, it will be easy to fetch them all in just one request. However, if you have hundred and thousands of products sometime even millions, you have to implement pagination to reduce the request hitting on the server. It is important to reduce latency and server load so that the app significantly improves the performance.

So if you want display so many data such as products list, items or blog posts on your web page then you need to implement pagination. For this reason we are learning how to implement basic Load more functionality for in this article. Keep in mind in this example, we will not use any server side rending rather fetch products locally for simplicity.


Steps to implement load more pagination in React

  1. Create a Next.js app
  2. Install TailwindCSS and Configuration
  3. Design the app
  4. Implement load more button functionality
  5. Output

1. Create a Next.js app

Start by creating new Next.js project with TailwindCSS. The quickest way to start using Tailwind CSS in your Next.js project is to use the Next.js + Tailwind CSS Example.


npx create-next-app load-more
cd load-more

2. Install TailwindCSS and Configuration

Install tailwindcssand its peer dependencies via npm, and then run the init command to generate both tailwind.config.js and postcss.config.js.


npm install -D tailwindcss postcss autoprefixer
npx tailwindcss init -p

Configure your template paths


module.exports = {
  content: [
    "./pages/**/*.{js,ts,jsx,tsx}",
    "./components/**/*.{js,ts,jsx,tsx}",
  ],
  theme: {
    extend: {},
  },
  plugins: [],
}

Add the Tailwind directives to your CSS

Add the @tailwinddirectives for each of Tailwind’s layers to your ./styles/globals.css file.


@tailwind base;
@tailwind components;
@tailwind utilities;

3. Design the app

Now let’s design the app. We will display list of groceries on the home page. Each product consists of item name, category and image. We will create few components and pages. We start with index.js page. This is main file for our app because it consists of <FreshProd /> component which is responsible to display all the products.


import Head from "next/head";
import Image from "next/image";
import Link from "next/link";
import FreshProd from "../components/FreshProd";

export default function Home() {
  return (
    <main className="container mx-auto px-8 sm:px-12">
      <section className="py-4">
        <div className="flex  items-center justify-between">
          <h2 className="text-md sm:text-2xl font-extrabold py-8">
            Stock Up on Fresh Favorites
          </h2>

          <Link href="/shop">
            <a className="text-base py-8 cursor-pointer text-black">See All</a>
          </Link>
        </div>
        <FreshProd />
      </section>
      <section className="py-4">
        <h2 className="text-2xl font-extrabold py-8">Recommended Products</h2>
        <FreshProd />
      </section>
    </main>
  );
}

As said before we will use all the data locally therefore we left all the data in FreshProd.js component as an object. All the images are also stored in images folder for simplicity. We will fetch data using an external APIs or maybe from firebase database later in another tutorial.


const freshProds = [
  {
    id: "1",
    src: "/images/100p.jpeg",
    name: "100 Plus",
    category: "Groceries",
  },
  {
    id: "2",
    src: "/images/Ajinomoto.jpeg",
    name: "Ajinomoto",
    category: "Groceries",
  },
  {
    id: "3",
    src: "/images/Almondnuts.jpg",
    name: "Almondnuts",
    category: "Groceries",
  }, 
];

Now, store this object in a map so we can display them on <Product /> component. For that we need to Destructuring Props.


function FreshProd() {

  return (
    <div>
      <div className="grid grid-cols-3">
        {freshProds?.map((freshprod) => (
          <Product
            key={freshprod.id}
            src={freshprod.src}
            name={freshprod.name}
            category={freshprod.category}
          />
        ))}
      </div>
    </div>
  );
}

export default FreshProd;

Up to this point, we are able to view all the products in Product component.


import React from "react";

import Image from "next/image";
function Product({ id, name, src, category }) {
  return (
    <div className="py-4">
      <div className="max-w-sm rounded overflow-hidden shadow-lg">
        <Image
          className="rounded-md"
          objectFit="fill"
          src={src}
          width={150}
          height={150}
        />
        <div className="px-6 py-4">
          <div className="font-bold text-xl mb-2">{name}</div>
          <p className="text-gray-700 text-base">{category}</p>
        </div>
      </div>
    </div>
  );
}

export default Product;

Now let’s try to write a function so that it display certain amount of products instead of displaying all the products on the screen. This is where we use Loadmore button and implement pagination on our app. In this case we want to display 6 products.


const [visible, setVisible] = useState(6);

  const showMoreItems = () => {
    setVisible((prevValue) => prevValue + 6);
  };

Lastly we slice the object, so in each time we press the button it will display 6 products on the screen. We use props to pass the data to Product component.


<div className="grid grid-cols-3">
   {freshProds?.slice(0, visible).map((freshprod) => (
      <Product
         key={freshprod.id}
         src={freshprod.src}
         name={freshprod.name}
         category={freshprod.category}
          />
     ))}
</div>

This is the button which is used to load more products on each click.


<div className=" flex flex-col  pt-8	">
    <button
      className=" content-between bg-transparent hover:bg-green-800 
      text-green-800 font-semibold hover:text-white py-2 px-4 border
      border-green-800 hover:border-transparent rounded"
      onClick={showMoreItems} >
          Load More
     </button>
</div>

Wrap Up

Thats it! Now we have implemented simple pagination or loadmore functionlity on our Next.js app project. We can improve this functionality and code but this is a good starting point.


Code

You can find the source code Github

Add Tailwind CSS to Existing React JS Project

Sandbanks are everywhere here in Maldives. Today, I went to a sandbank called Vagaath gale hutta (I believe that is the correct location), which is roughly 5 miles north west of Dhevvadhoo. During the trip I took time to write this tutorial.

So without further ado let’s begin…

Front-end technologies are constantly evolving. Some technologies are becoming incredibly popular among the developers while others get less attraction. When it comes to front-end development, now React JS has become number one choice for most of the developers.

When it comes to CSS frameworks, TailwindCSS started to get more stars on Github meaning developers love to use TailwindCSS over other CSS technologies.


React JS


React JS is a JavaScript library developed by Facebook. React JS is efficient, declarative and flexible open-source JavaScript library which lets developers to build scalable frontend web applications much faster and easier. It offers tons of benefits. Compare to other front-end frameworks, React JS is easy to learn, SEO-friendly, helps to build rich user interfaces, able to write custom components and much more.


TailwindCSS


TailwindCSS is utility-based low level CSS framework intended to ease building web applications much faster and efficiently. TailwindCSS helps to build websites without ever leaving your HTML files.

In this tutorial, you will learn how to add tailwindCSS to an existing React JS application. So without further ado let’s create a react app by running the following command.


npx create-react-app react-tailwind
cd react-tailwind

Go to directory of your my-app and run the following command.


npm i tailwindcss postcss-cli autoprefixer -D

Enter the following command to create the default configuration. This will create a tailwind.js file in the current directory.


npx tailwind init tailwind.js --full

Now, we need to create postcss.config.js file. For that simply run the command below. PostCSS is a tool for transforming styles with JS plugins.


touch postcss.config.js

const tailwindcss = require('tailwindcss');
module.exports = {
    plugins: [
        tailwindcss('./tailwind.js'),
        require('autoprefixer')
    ],
};

Create an assets directory in the src folder.


mkdir ./src/assets

Then create a file called tailwind.css in ./src/assets.


touch ./src/assets/tailwind.css

Now open tailwind.css and then import the following tailwind files as shown.


@import "tailwindcss/base";

@import "tailwindcss/components";

@import "tailwindcss/utilities";

Now it is time to modify package.json file just little bit. Simply add the following lines in the scripts tags.


"scripts": {
    "start": "yarn watch:css && react-scripts start",
    "build": "yarn build:css && react-scripts build",
    "test": "react-scripts test",
    "eject": "react-scripts eject",
    "build:css": "postcss src/assets/tailwind.css -o src/assets/main.css",
    "watch:css": "postcss src/assets/tailwind.css -o src/assets/main.css"
  },

Lastly import the file ./src/assets/main.css in the App.js file (or the root file of the application).


import React from "react";
import ReactDOM from "react-dom";
import './assets/main.css';
ReactDOM.render(<App />, document.getElementById("root"));

Now run the development server. Simply run:

npm start

Thats all! Now you can able to use Tailwind classes in your React JS application.

Code: Github