Category Archives: React

Why You Want to Choose Next.js for Your Next Projects in 2022


5 Killer game-changing features in Next.js 12.


It was a while ago when the newest version of Next.js has released. Today we will look into the features that came with Next.js 12. But before that, first let me tell you something about of Next.js.


Introduction


Next.js is an open-source development framework built on top of React.js. It is React based framework which have various functionalities to power up both server-side rendering and generating client side static websites.

Next.js gives you the best developer experience with all the features it present for any production ready apps. Features such as hybrid static & server rendering, TypeScript support, smart bundling, route pre-fetching give developers a seamless development experience. Here are its newest features available in the latest version of its release:

So what are the game changing features available in the recent release.


Middleware


Middleware is not a new concept. Frameworks such as Express.js and Laravel use middleware to intercept http requests and process in someway before it goes to actual route handler.

This is one of the most exciting features in this release. Why this version is special and exciting?

You want your website to be fast and efficient. The best way to make it happened is to cache pre-built html pages on a CDN. But when you do that you lose ability to make your pages dynamic.

On the other side, you have server side rendering that uses a node server to fetch data from a database or an api when when the incoming request comes in. The problem in that is, it is slow and inefficient. In a perfect world users need speed and dynamic content at the same time.

Next.js has very clever approach, leading the way to achieve both at the same time. Vercel, the parent company of Next.js has a product called edge function feature. These are serverless functions like AWS lambda or Google Cloud function except they are deployed to the edge like CDN so your end users get extremely fast executions.

Common use cases for where we can use middleware are?

  • User Authentication
  • Bot protection
  • Redirects and rewrites
  • Handling unsupported browsers
  • Service-side analytics
  • Logging

Concurrent Mode


Concurrent Mode helps React apps stay responsive. It gracefully adjust to the user’s device capabilities and network speed. React 18 adds new features including, Suspense, automatic batching of updates, APIs like startTransition, and a new streaming API for server rendering with support for React.lazy.

If you are not familiar with suspense it is basically a component that allows you to wait asynchronous data before rending its children. In previous version of Next.js if we use this suspense component it would result an error as it is not compatible with previous versions. In Next.js 12 it supports this feature and we get ability to implement it by enabling SSR Streaming.

To enable concurrent mode, Ensure you have the rc npm tag of React installed first then use the experimental flag concurrentFeatures: true::


npm install next@latest react@rc react-dom@rc

// next.config.js
module.exports = {
  experimental: {
    concurrentFeatures: true,
  },
}

Server Components


React Server Components render everything, including the components themselves, on the server. This is fundamentally different from server-side rendering where you’re pre-generating HTML on the server. With Server Components, there’s zero client-side JavaScript needed, making page rendering faster.

Server components allow you to natively render html from a react component on the server. It uses http streaming to progressively render a web page on the server. That means if you need data for one component and then another component and another, you don’t have to wait for one after the other. It will render the first one, the next one and so on.

With server components you can stream html from an edge function immediately and progressively show update as your data comes in. This improves the user experience of your application, pairing the best parts of server-rendering with client-side interactivity.

How to Enable React Server Components

To use React Server Components, ensure you have React 18 installed. Then, turn on the concurrentFeatures and serverComponents options in next.config.js:


// next.config.js
module.exports = {
  experimental: {
    concurrentFeatures: true,
    serverComponents: true,
  },
}

Next, if you already have customized pages/_document component, you need to remove the getInitialProps static method and the getServerSideProps export if there’s any, otherwise it won’t work with server components. If no custom Document component is provided, Next.js will fallback to a default one like below.


// pages/_document.js
import { Html, Head, Main, NextScript } from 'next/document'

export default function Document() {
  return (
    <Html>
      <Head />
      <body>
        <Main />
        <NextScript />
      </body>
    </Html>
  )
}

URL Imports


URL imports is now available in the newest version. Next.js team has been experimenting this services for a while to make sure it fully supports ES Modules in the previous version.

This feature is nice to have as we can now import open source packages directly from the CDN without any extra builds or installs. We will be able to import required packages from CDN rather than having to build them locally. Therefore, now we can use popular CDN source such as Skypack in your Next.js app.

The major benefit of using package over CDN is, they speeds up any website instantly using optimized JavaScript hosting services. The production-ready CDN is powered by Google Cloud, Cloudflare and AWS. It creates ready-for-production tools without the hassle of compiling and bundling them seamlessly. It scans NPM and builds executable ES module packages that you can import from your Browser.

To enable this feature? The URL has to be specified in the next.config.js file. You need to only enable domains that you trust.


module.exports = {
  experimental: {
    urlImports: ['https://cdn.skypack.dev'],
  },
}

Collaborative Live Coding


Working from home is increasingly common these days. Even before COVID-19, remote job was a popular trend. The shift means that you need more collaborative tools to work better as a team. With Next.js 12 this is taken to the next level. Now we are able to code, share, draw and edit instantly within your Browser using vercel platform. Your application will be hosted in Vercel.com and integrated through your chosen git vendor. After the deployment process, vercel provides you a live URL within seconds and kick off a pair programming session.

The most relevant features are:

  • In-browser editing
  • Invite any team member
  • Only your favorite browser is required
// Vercel collaborative feature URL
https://vercel.com/live  

Wrap Up


In a nutshell, Next 12 is a complete game changer since it’s focused on development friendliness and performance in mind.

With Next.js 12, overall development workflows will be improved. It creates more possibilities for your web projects. By improving existing processes and functionalities, and adding new features to the framework, frontend developers now have more tools to create better user experiences in an efficient way.

As of now some of the awesome features are not stable, however we can still use those features in our application as we await a stable release of React 18.

Build Responsive Mobile Navigation With NextJS and TailwindCSS

NextJS

Next.js is an open-source development framework built on top of React.js. It is React based framework which have various functionalities to power up both server-side rendering and generating client side static websites.

Next.js gives you the best developer experience with all the features it present for any production ready apps. Features such as hybrid static & server rendering, TypeScript support, smart bundling, route pre-fetching give developers a seamless development experience.


TailwindCSS

TailwindCSS is utility-based low level CSS framework intended to ease building web applications much faster and more efficiently. TailwindCSS is so popular nowadays, because it helps build websites without ever leaving your HTML files.

The purpose of this post is to show how easy and intuitive it can be to make a responsive navbar in NextJS with the help of TailwindCSS. So let’s begin. Before we start writing some code, we need to do some initial configuration for tailwind and Nextjs.

Setup and configuration

So, the first thing that we need is install NextJS with NextCli, in our case we prefer to use npm.

Start by creating a new Next.js project if you don’t have one set up already. The most common approach is to use Create Next App:


npx create-next-app -e with-tailwindcss responsive-navigation

After creating our boilerplate code, we proceed to install Tailwind and the dependencies:

Setting up Tailwind CSS

To begin with, we install Tailwind. Tailwind CSS requires Node.js so we need to have compatible node version first. After that we can install Tailwind via npm.

Note: Tailwind CSS requires Node.js 12.13.0 or higher.

Install Tailwind via npm

npm install -D tailwindcss@latest postcss@latest autoprefixer@latest

Create your configuration files

To generate our tailwind.config.js and postcss.config.js files:

npx tailwindcss init -p

This will create a minimal tailwind.config.js file at the root of your project. It will also create a postcss.config.js file that includes tailwindCSS and autoprefixer already configured:

Now we need to create Navbar.js in components folder and then call this file directly in Index.js.

import { Navbar } from "../components/Navbar";

export default function Home() {
  return (
    <div>
      <Navbar />
      <div>Responsive Navigations</div>
    </div>
  );
}

Next create navigation bar in the main header. In addition we will proceed to add the hamburger menu that will be responsive for mobile and desktop screens.

import Link from 'next/link';

export const Navbar = () => {
  return (
    <>
      <nav className='flex items-center flex-wrap bg-green-400 p-3 '>
        <Link href='/'>
          <a className='inline-flex items-center p-2 mr-4 '>
            <svg
              viewBox='0 0 24 24'
              xmlns='http://www.w3.org/2000/svg'
              className='fill-current text-white h-8 w-8 mr-2'
            >
              <path d='M12.001 4.8c-3.2 0-5.2 1.6-6 4.8 1.2-1.6 2.6-2.2 4.2-1.8.913.228 1.565.89 2.288 1.624C13.666 10.618 15.027 12 18.001 12c3.2 0 5.2-1.6 6-4.8-1.2 1.6-2.6 2.2-4.2 1.8-.913-.228-1.565-.89-2.288-1.624C16.337 6.182 14.976 4.8 12.001 4.8zm-6 7.2c-3.2 0-5.2 1.6-6 4.8 1.2-1.6 2.6-2.2 4.2-1.8.913.228 1.565.89 2.288 1.624 1.177 1.194 2.538 2.576 5.512 2.576 3.2 0 5.2-1.6 6-4.8-1.2 1.6-2.6 2.2-4.2 1.8-.913-.228-1.565-.89-2.288-1.624C10.337 13.382 8.976 12 6.001 12z' />
            </svg>
            <span className='text-xl text-white font-bold uppercase tracking-wide'>
              Responsive Navigation
            </span>
          </a>
        </Link>
        <button className=' inline-flex p-3 hover:bg-gray-900 rounded lg:hidden text-white ml-auto hover:text-white outline-none'>
          <svg
            className='w-6 h-6'
            fill='none'
            stroke='currentColor'
            viewBox='0 0 24 24'
            xmlns='http://www.w3.org/2000/svg'
          >
            <path
              strokeLinecap='round'
              strokeLinejoin='round'
              strokeWidth={2}
              d='M4 6h16M4 12h16M4 18h16'
            />
          </svg>
        </button>
        <div className='hidden w-full lg:inline-flex lg:flex-grow lg:w-auto'>
          <div className='lg:inline-flex lg:flex-row lg:ml-auto lg:w-auto w-full lg:items-center items-start  flex flex-col lg:h-auto'>
            <Link href='/'>
              <a className='lg:inline-flex lg:w-auto w-full px-3 py-2 rounded text-white font-bold items-center justify-center hover:bg-gray-600 hover:text-white '>
                Home
              </a>
            </Link>
            <Link href='/'>
              <a className='lg:inline-flex lg:w-auto w-full px-3 py-2 rounded text-white font-bold items-center justify-center hover:bg-gray-600 hover:text-white'>
                Services
              </a>
            </Link>
            <Link href='/'>
              <a className='lg:inline-flex lg:w-auto w-full px-3 py-2 rounded text-white font-bold items-center justify-center hover:bg-gray-600 hover:text-white'>
                About us
              </a>
            </Link>
            <Link href='/'>
              <a className='lg:inline-flex lg:w-auto w-full px-3 py-2 rounded text-white font-bold items-center justify-center hover:bg-gray-600 hover:text-white'>
                Contact
              </a>
            </Link>
          </div>
        </div>
      </nav>
    </>
  );
};

Lastly we need a function that hide and show the menu as we click in the hamburger menu. For this we create a state using the useState hook and a function for the button to click the button. We need to call this function when we click the button on the menu.

There is break points which lets, navigation bar to change based on the break points. When it hit small screen sizes such as mobile views, the hamburger menu will be activated. However when we view on large screens the default inline navigation bar activates.

const [active, setActive] = useState(false);

  const handleClick = () => {
    setActive(!active);
  };
<button
    className=' inline-flex p-3 hover:bg-green-600 rounded lg:hidden text-white ml-auto hover:text-white outline-none'
    onClick={handleClick}
  >
    <svg
      className='w-6 h-6'
      fill='none'
      stroke='currentColor'
      viewBox='0 0 24 24'
      xmlns='http://www.w3.org/2000/svg'
    >
      <path
        strokeLinecap='round'
        strokeLinejoin='round'
        strokeWidth={2}
        d='M4 6h16M4 12h16M4 18h16'
      />
    </svg>
</button>

Conclusion

That it’s all. Now we have created a simple responsive responsive menu navigation using NextJS and TailwindCSS.

If you want to learn more on TailwindCSS and NextJS please follow these links of their official sites. Both these technologies are powerful frameworks with great documentation that will allow us to learn more build fun products.

Code Github

Add Tailwind CSS to Existing React JS Project

Sandbanks are everywhere here in Maldives. Today, I went to a sandbank called Vagaath gale hutta (I believe that is the correct location), which is roughly 5 miles north west of Dhevvadhoo. During the trip I took time to write this tutorial.

So without further ado let’s begin…

Front-end technologies are constantly evolving. Some technologies are becoming incredibly popular among the developers while others get less attraction. When it comes to front-end development, now React JS has become number one choice for most of the developers.

When it comes to CSS frameworks, TailwindCSS started to get more stars on Github meaning developers love to use TailwindCSS over other CSS technologies.


React JS


React JS is a JavaScript library developed by Facebook. React JS is efficient, declarative and flexible open-source JavaScript library which lets developers to build scalable frontend web applications much faster and easier. It offers tons of benefits. Compare to other front-end frameworks, React JS is easy to learn, SEO-friendly, helps to build rich user interfaces, able to write custom components and much more.


TailwindCSS


TailwindCSS is utility-based low level CSS framework intended to ease building web applications much faster and efficiently. TailwindCSS helps to build websites without ever leaving your HTML files.

In this tutorial, you will learn how to add tailwindCSS to an existing React JS application. So without further ado let’s create a react app by running the following command.


npx create-react-app react-tailwind
cd react-tailwind

Go to directory of your my-app and run the following command.


npm i tailwindcss postcss-cli autoprefixer -D

Enter the following command to create the default configuration. This will create a tailwind.js file in the current directory.


npx tailwind init tailwind.js --full

Now, we need to create postcss.config.js file. For that simply run the command below. PostCSS is a tool for transforming styles with JS plugins.


touch postcss.config.js

const tailwindcss = require('tailwindcss');
module.exports = {
    plugins: [
        tailwindcss('./tailwind.js'),
        require('autoprefixer')
    ],
};

Create an assets directory in the src folder.


mkdir ./src/assets

Then create a file called tailwind.css in ./src/assets.


touch ./src/assets/tailwind.css

Now open tailwind.css and then import the following tailwind files as shown.


@import "tailwindcss/base";

@import "tailwindcss/components";

@import "tailwindcss/utilities";

Now it is time to modify package.json file just little bit. Simply add the following lines in the scripts tags.


"scripts": {
    "start": "yarn watch:css && react-scripts start",
    "build": "yarn build:css && react-scripts build",
    "test": "react-scripts test",
    "eject": "react-scripts eject",
    "build:css": "postcss src/assets/tailwind.css -o src/assets/main.css",
    "watch:css": "postcss src/assets/tailwind.css -o src/assets/main.css"
  },

Lastly import the file ./src/assets/main.css in the App.js file (or the root file of the application).


import React from "react";
import ReactDOM from "react-dom";
import './assets/main.css';
ReactDOM.render(<App />, document.getElementById("root"));

Now run the development server. Simply run:

npm start

Thats all! Now you can able to use Tailwind classes in your React JS application.

Code: Github

The Must Know Things About useState

State management is one of the most important parts of any application. Understanding state management is incredibly important as current trend heavily focuses on robust way to manage state of the application as data are constantly read or modified by the users.

In this example we are going make simple counter app with two buttons in order to understand the state management of a react application. We will implement counter button functionality using useState Hooks.

So without further ado let’s create a react app by running the following command.

npx create-react-app my-app
cd my-app
npm start

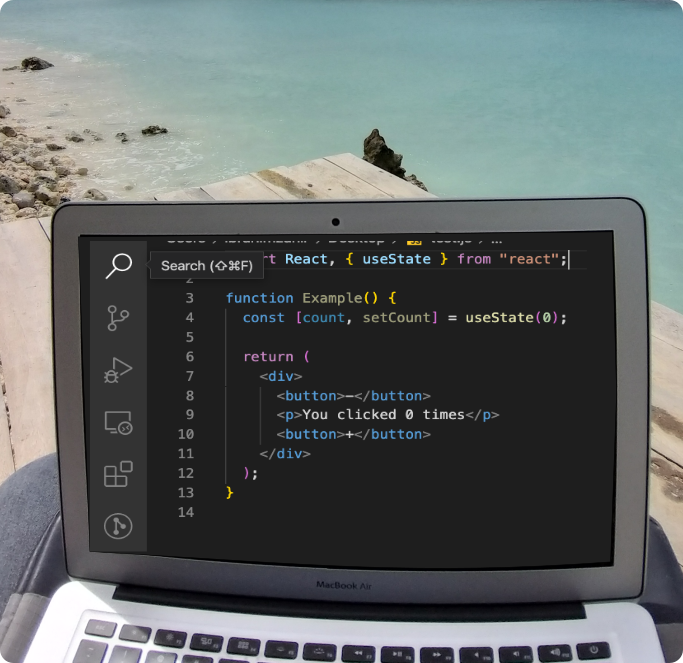
After little bit of clean up, this is our App.js file looks like as of now.


import React, { useState } from 'react';'

function Example() {
 

  const [count, setCount] = useState(0);

  return (
    <div>
      <button>-</button>
      <p>You clicked 0 times</p>
      <button>+</button>
    </div>
  );
}

Where can we use useState Hooks?

We can only use useState Hooks inside of a function component. This is not possible in a class components. We can only mix classes and function components with Hooks in a single tree. There for we must to use function components to use Hooks.


Only Hooks at the top level


Do not call Hooks inside loops, conditions or nested functions. Always use Hooks at the top level of your React function before any early returns. Hooks must call in the same order each time a components renders. Thats what allow React to correctly preserve the state of Hooks between multiple useState and useEffect calls.


function Form() {
  // 1. Use the name state variable
  const [name, setName] = useState('Mary');

  // 2. Use an effect for persisting the form
  useEffect(function persistForm() {
    localStorage.setItem('formData', name);
  });

  // 3. Use the surname state variable
  const [surname, setSurname] = useState('Poppins');

  // 4. Use an effect for updating the title
  useEffect(function updateTitle() {
    document.title = name + ' ' + surname;
  });

  // ...
}

So from this example above, how React knows which State corresponds to which useState call?

Well, React relies on the order in which Hooks are called.


// ------------
// First render
// ------------
useState('Mary')           // 1. Initialize the name state variable with 'Mary'
useEffect(persistForm)     // 2. Add an effect for persisting the form
useState('Poppins')        // 3. Initialize the surname state variable with 'Poppins'
useEffect(updateTitle)     // 4. Add an effect for updating the title

// -------------
// Second render
// -------------
useState('Mary')           // 1. Read the name state variable (argument is ignored)
useEffect(persistForm)     // 2. Replace the effect for persisting the form
useState('Poppins')        // 3. Read the surname state variable (argument is ignored)
useEffect(updateTitle)     // 4. Replace the effect for updating the title

Let’s go back to useState and how to use it.

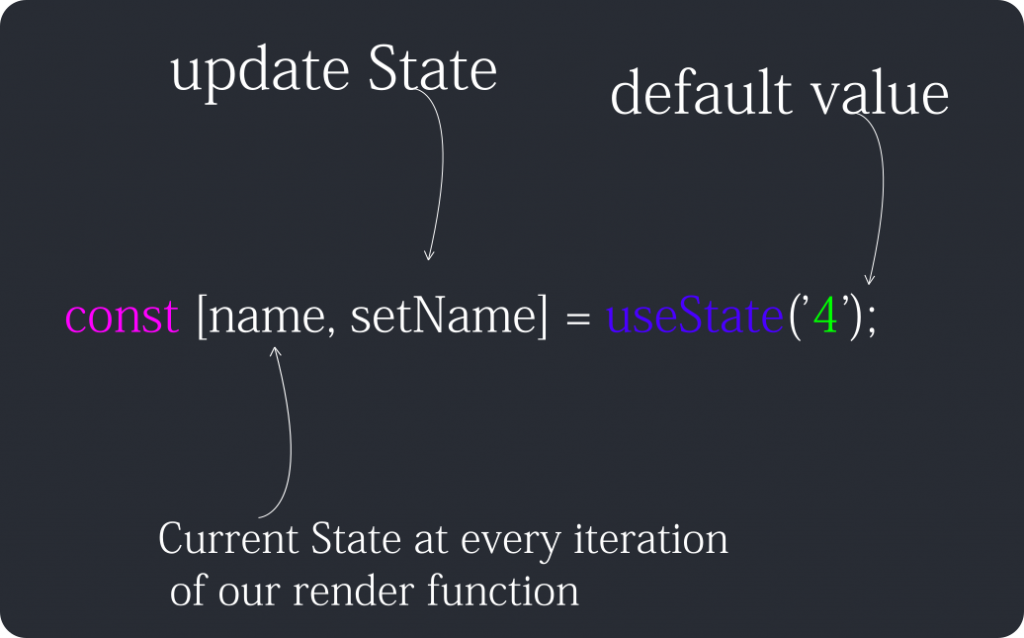
To use useState Hooks, all we need to do is to call useState function and pass the default state inside the parameter. useState return arrays of values. As we know array always have two values.


Now focus on setCount value and how we set the value inside the component. To do that, we create onClick function inside the button.


import React, { useState } from 'react';'

function Example() {
 

  const [count, setCount] = useState(0);

  return (
    <div>
      <button onClick={documentCount}>-</button>
			<span><p>You clicked 0 times</p><span>
			<button>+</button>
    </div>
  );
}

Create documentCount function which will remove one fro our count every time as we click the button.


function documentCount() {
    setCount(prevCount => prevCount - 1)
  }

Now we can able to update our count by decreasing by one each time as we click the button and then render our component for the new value.

That all for now. We will continue writing more tutorials on state management in future.

Full code: ReactStateManagement