NextJS
Next.js is an open-source development framework built on top of React.js. It is React based framework which have various functionalities to power up both server-side rendering and generating client side static websites.
Next.js gives you the best developer experience with all the features it present for any production ready apps. Features such as hybrid static & server rendering, TypeScript support, smart bundling, route pre-fetching give developers a seamless development experience.
TailwindCSS
TailwindCSS is utility-based low level CSS framework intended to ease building web applications much faster and more efficiently. TailwindCSS is so popular nowadays, because it helps build websites without ever leaving your HTML files.
The purpose of this post is to show how easy and intuitive it can be to make a responsive navbar in NextJS with the help of TailwindCSS. So let’s begin. Before we start writing some code, we need to do some initial configuration for tailwind and Nextjs.
Setup and configuration
So, the first thing that we need is install NextJS with NextCli, in our case we prefer to use npm.
Start by creating a new Next.js project if you don’t have one set up already. The most common approach is to use Create Next App:
npx create-next-app -e with-tailwindcss responsive-navigationAfter creating our boilerplate code, we proceed to install Tailwind and the dependencies:
Setting up Tailwind CSS
To begin with, we install Tailwind. Tailwind CSS requires Node.js so we need to have compatible node version first. After that we can install Tailwind via npm.
Note: Tailwind CSS requires Node.js 12.13.0 or higher.
Install Tailwind via npm
npm install -D tailwindcss@latest postcss@latest autoprefixer@latestCreate your configuration files
To generate our tailwind.config.js and postcss.config.js files:
npx tailwindcss init -pThis will create a minimal tailwind.config.js file at the root of your project. It will also create a postcss.config.js file that includes tailwindCSS and autoprefixer already configured:
Now we need to create Navbar.js in components folder and then call this file directly in Index.js.
import { Navbar } from "../components/Navbar";

export default function Home() {
  return (
    <div>
      <Navbar />
      <div>Responsive Navigations</div>
    </div>
  );
}
Next create navigation bar in the main header. In addition we will proceed to add the hamburger menu that will be responsive for mobile and desktop screens.
import Link from 'next/link';
export const Navbar = () => {
return (
<>
<nav className='flex items-center flex-wrap bg-green-400 p-3 '>
<Link href='/'>
<a className='inline-flex items-center p-2 mr-4 '>
<svg
viewBox='0 0 24 24'
xmlns='http://www.w3.org/2000/svg'
className='fill-current text-white h-8 w-8 mr-2'
>
<path d='M12.001 4.8c-3.2 0-5.2 1.6-6 4.8 1.2-1.6 2.6-2.2 4.2-1.8.913.228 1.565.89 2.288 1.624C13.666 10.618 15.027 12 18.001 12c3.2 0 5.2-1.6 6-4.8-1.2 1.6-2.6 2.2-4.2 1.8-.913-.228-1.565-.89-2.288-1.624C16.337 6.182 14.976 4.8 12.001 4.8zm-6 7.2c-3.2 0-5.2 1.6-6 4.8 1.2-1.6 2.6-2.2 4.2-1.8.913.228 1.565.89 2.288 1.624 1.177 1.194 2.538 2.576 5.512 2.576 3.2 0 5.2-1.6 6-4.8-1.2 1.6-2.6 2.2-4.2 1.8-.913-.228-1.565-.89-2.288-1.624C10.337 13.382 8.976 12 6.001 12z' />
</svg>
<span className='text-xl text-white font-bold uppercase tracking-wide'>
Responsive Navigation
</span>
</a>
</Link>
<button className=' inline-flex p-3 hover:bg-gray-900 rounded lg:hidden text-white ml-auto hover:text-white outline-none'>
<svg
className='w-6 h-6'
fill='none'
stroke='currentColor'
viewBox='0 0 24 24'
xmlns='http://www.w3.org/2000/svg'
>
<path
strokeLinecap='round'
strokeLinejoin='round'
strokeWidth={2}
d='M4 6h16M4 12h16M4 18h16'
/>
</svg>
</button>
<div className='hidden w-full lg:inline-flex lg:flex-grow lg:w-auto'>
<div className='lg:inline-flex lg:flex-row lg:ml-auto lg:w-auto w-full lg:items-center items-start flex flex-col lg:h-auto'>
<Link href='/'>
<a className='lg:inline-flex lg:w-auto w-full px-3 py-2 rounded text-white font-bold items-center justify-center hover:bg-gray-600 hover:text-white '>
Home
</a>
</Link>
<Link href='/'>
<a className='lg:inline-flex lg:w-auto w-full px-3 py-2 rounded text-white font-bold items-center justify-center hover:bg-gray-600 hover:text-white'>
Services
</a>
</Link>
<Link href='/'>
<a className='lg:inline-flex lg:w-auto w-full px-3 py-2 rounded text-white font-bold items-center justify-center hover:bg-gray-600 hover:text-white'>
About us
</a>
</Link>
<Link href='/'>
<a className='lg:inline-flex lg:w-auto w-full px-3 py-2 rounded text-white font-bold items-center justify-center hover:bg-gray-600 hover:text-white'>
Contact
</a>
</Link>
</div>
</div>
</nav>
</>
);
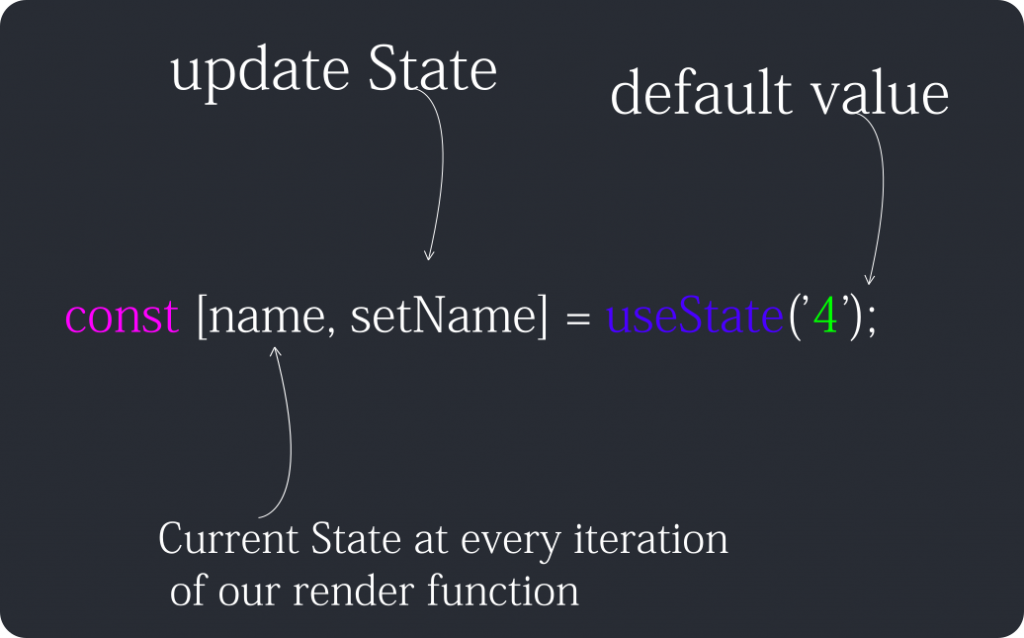
};Lastly we need a function that hide and show the menu as we click in the hamburger menu. For this we create a state using the useState hook and a function for the button to click the button. We need to call this function when we click the button on the menu.
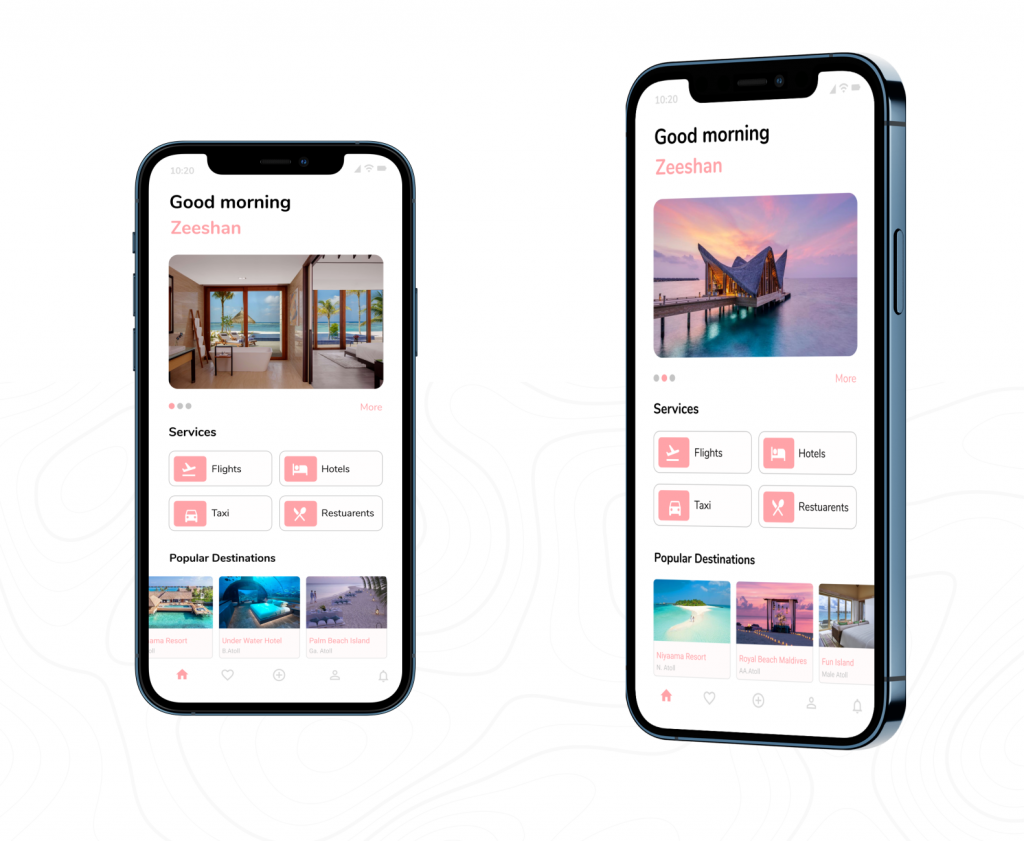
There is break points which lets, navigation bar to change based on the break points. When it hit small screen sizes such as mobile views, the hamburger menu will be activated. However when we view on large screens the default inline navigation bar activates.
const [active, setActive] = useState(false);

  const handleClick = () => {
    setActive(!active);
  };
<button
className=' inline-flex p-3 hover:bg-green-600 rounded lg:hidden text-white ml-auto hover:text-white outline-none'
onClick={handleClick}
>
<svg
className='w-6 h-6'
fill='none'
stroke='currentColor'
viewBox='0 0 24 24'
xmlns='http://www.w3.org/2000/svg'
>
<path
strokeLinecap='round'
strokeLinejoin='round'
strokeWidth={2}
d='M4 6h16M4 12h16M4 18h16'
/>
</svg>
</button>Conclusion
That it’s all. Now we have created a simple responsive responsive menu navigation using NextJS and TailwindCSS.
If you want to learn more on TailwindCSS and NextJS please follow these links of their official sites. Both these technologies are powerful frameworks with great documentation that will allow us to learn more build fun products.
Code Github