Category Archives: Technology

How to Add Custom Fonts to NextJS and Tailwind CSS Application

Add Custom Fonts to NextJS and Tailwind CSS Application

Tailwind CSS offers powerful capabilities to build visually appealing websites in a short time frame. To give your website a unique look and feel, you can choose to add custom fonts to NextJS project using Tailwind configuration.

Setting up a custom font in Next.js using Tailwind CSS is fairly easy. It needs 3 easy steps.

  • Installation and setting up _document.js
  • Declaring custom font family in tailwind.config.js
  • Using it in your components and pages.

For this tutorial, we will use Montserrat, a free Google Font. So let us begin installation process.

Create Your NextJs Project

The quickest way to start using Tailwind CSS in your Next.js project is to use the Next.js + Tailwind CSS Example. This will automatically configure your Tailwind setup based on the official Next.js example. If you’d like to configure Tailwind manually, continue with the rest of this guide.

Create your project

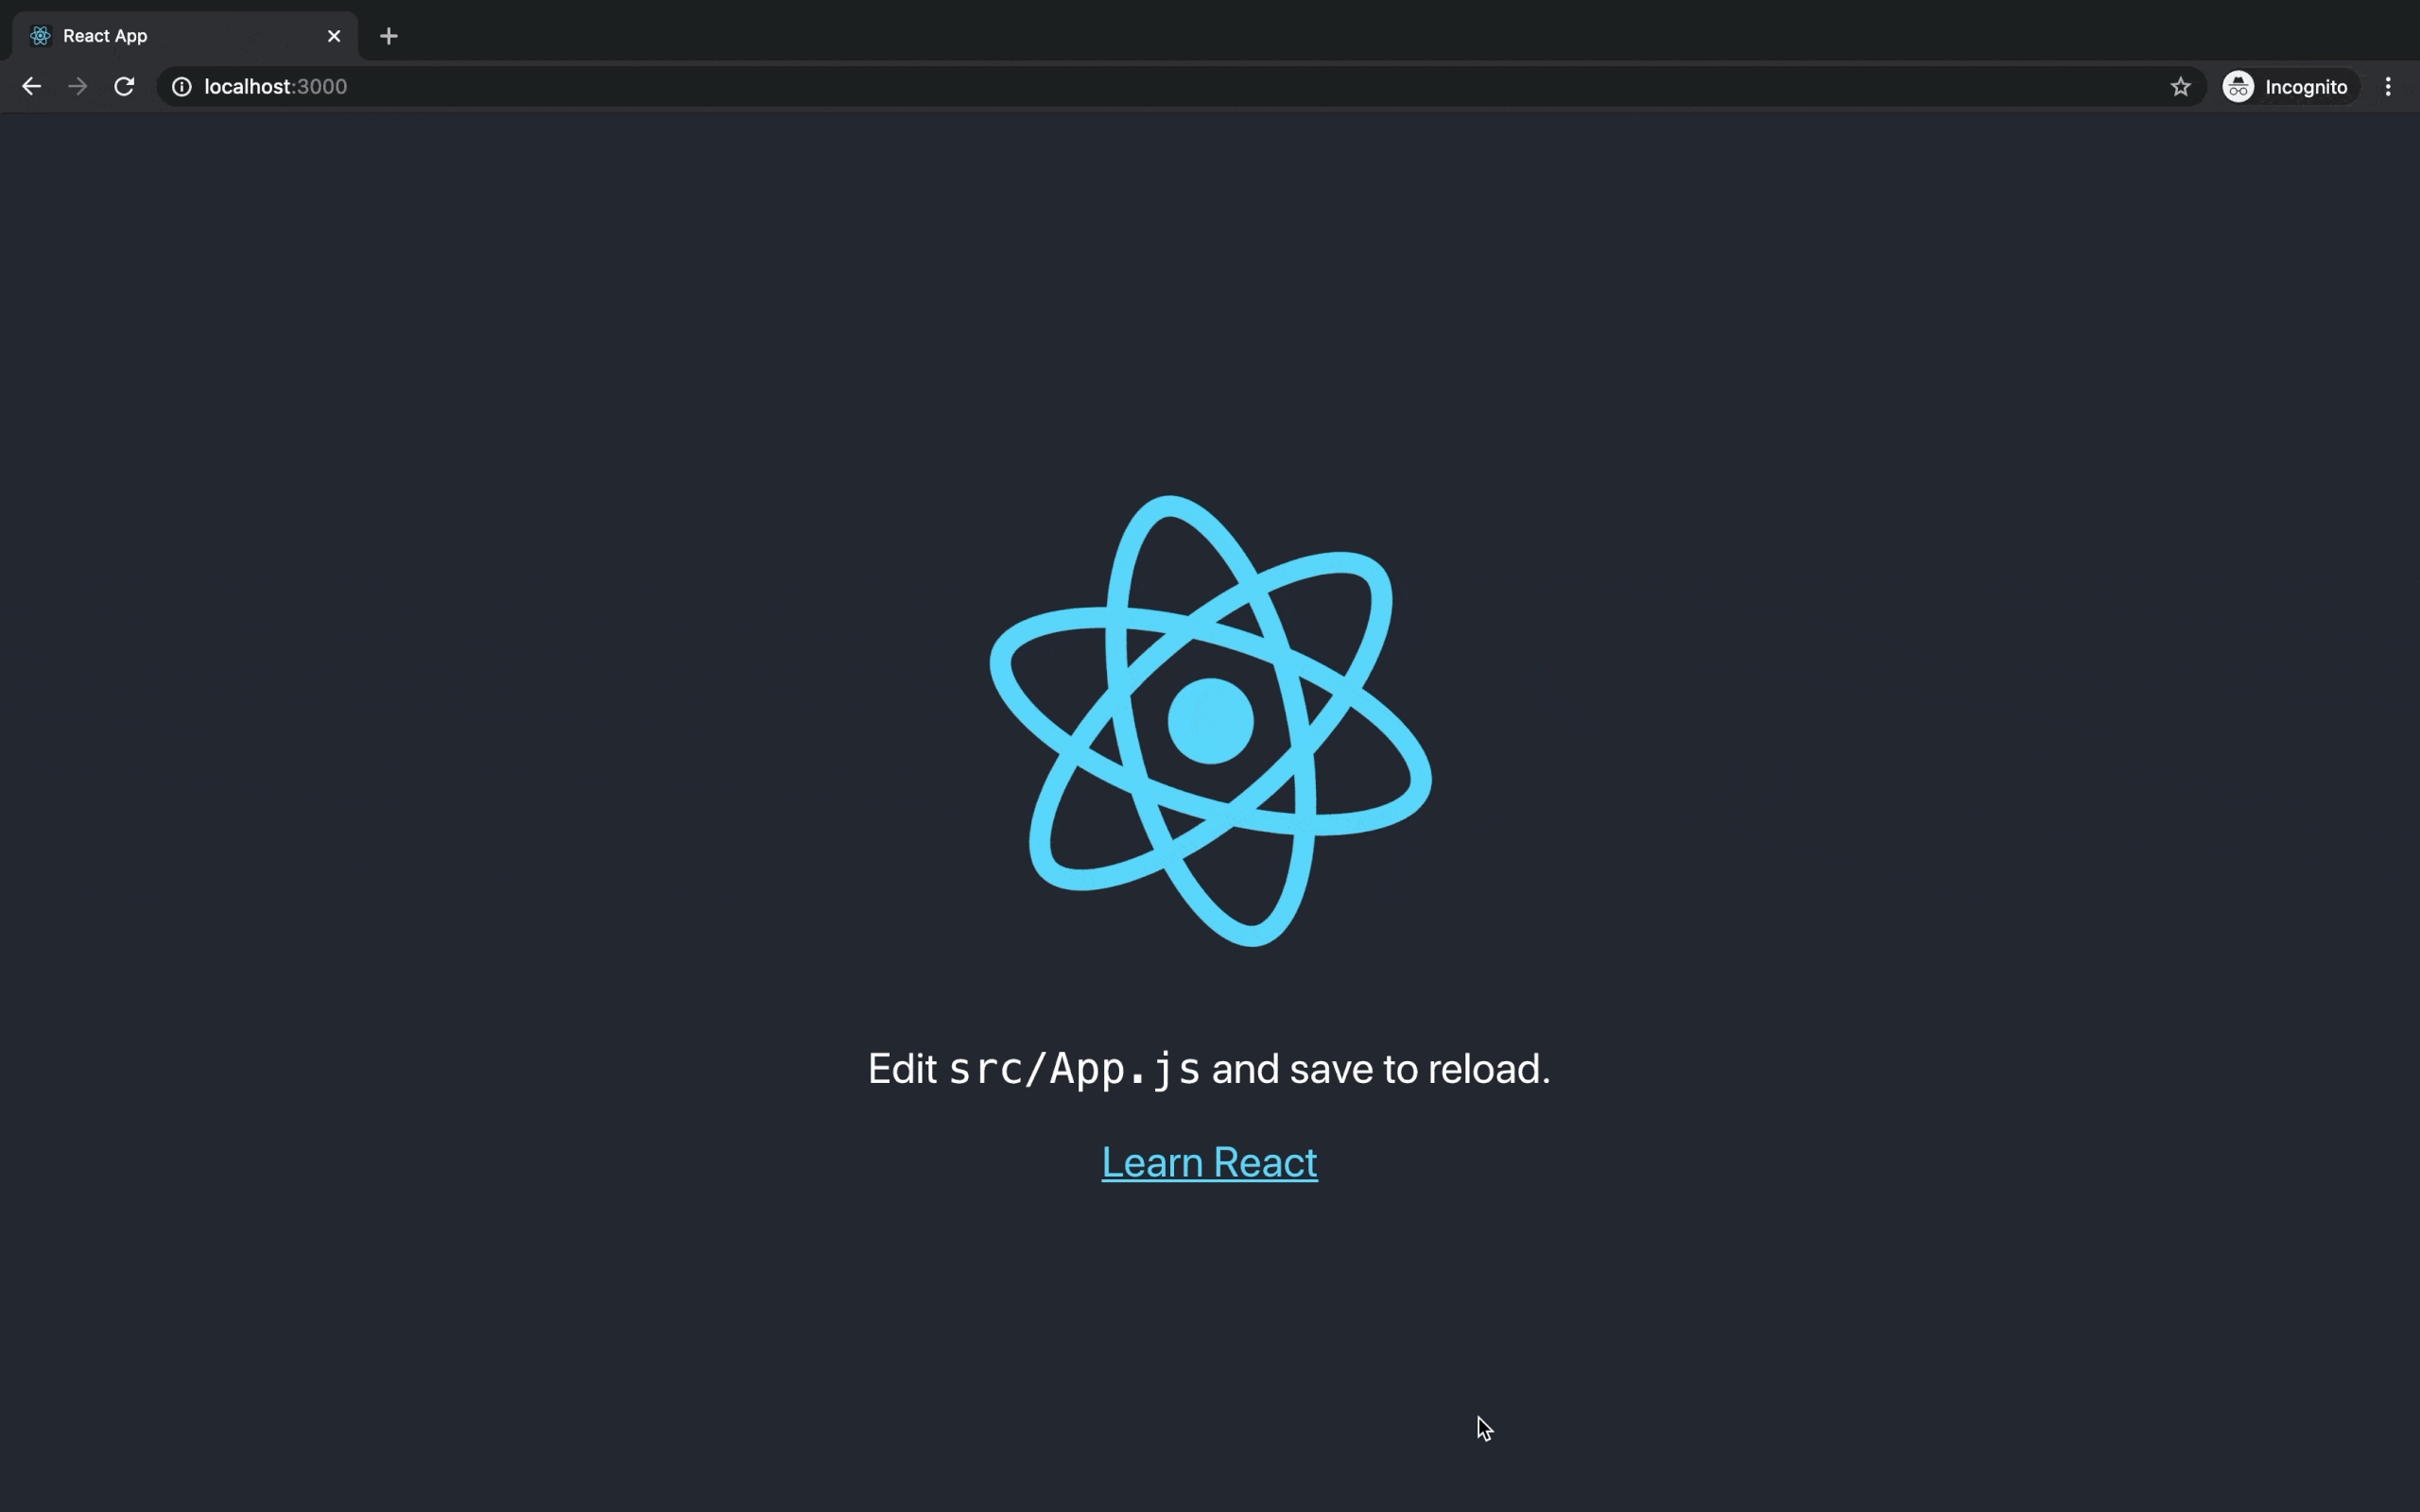
Start by creating a new Next.js project if you don’t have one set up already. The most common approach is to use Create Next App.

npx create-next-app nextjs-tailwind-tips
cd nextjs-tailwind-tips

If everything has goes well, you will see something like this on your terminal.

Install Tailwind CSS

Install tailwindcss and its peer dependencies via npm, and then run the init command to generate both tailwind.config.js and postcss.config.js.

npm install -D tailwindcss postcss autoprefixer
npx tailwindcss init -p

Configure your template paths

Add the paths to all of your template files in your tailwind.config.js file.

module.exports = {
  content: [
    "./pages/**/*.{js,ts,jsx,tsx}",
    "./components/**/*.{js,ts,jsx,tsx}",
  ],
  theme: {
    extend: {},
  },
  plugins: [],
}

Add the Tailwind directives to your CSS

Add the @tailwind directives for each of Tailwind’s layers to your ./styles/globals.css file.

@tailwind base;
@tailwind components;
@tailwind utilities;

Add Google Font to _document.js File

A custom Document can update the <html> and <body> tags used to render a Page. This file is only rendered on the server, so event handlers like onClick cannot be used in _document.

To override the default Document create a new custom document file _document.js in your pages folder next-project/pages/ and set it up with the following code:

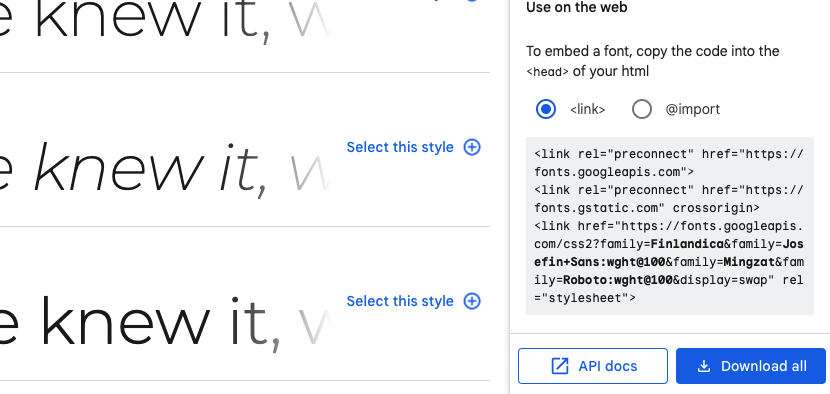
Go to Google Fonts and search for the specific font you like. For this tutorial, we will use Montserrat, a free Google Font. Select the style variants from thin (100) to bold (900). Copy the link provided by Google and past in between the Head tags.

import Document, { Html, Head, Main, NextScript } from "next/document";

function MyDocument() {
  return (
    <Html>
      <Head>
        <link
          href="https://fonts.googleapis.com/css2?family=Montserrat:wght@100;200&display=swap"
          rel="stylesheet"
        />
      </Head>
      <body>
        <Main />
        <NextScript />
      </body>
    </Html>
  );
}

export default MyDocument;

Now, it’s time to configure the tailwind.config.js file. Go to Add tailwind.config.js and add Montserrat as the font family for your app. Also remember to add defaulTheme for the app as shown below.

/** @type {import('tailwindcss').Config} */
const defaultTheme = require("tailwindcss/defaultTheme");

module.exports = {
  mode: "jit",
  purge: ["./pages/**/*.{js,ts,jsx,tsx}", "./components/**/*.{js,ts,jsx,tsx}"],
  darkMode: false, // or 'media' or 'class'
  theme: {
    extend: {
      fontFamily: {
        Montserrat: ["Montserrat", ...defaultTheme.fontFamily.sans],
      },
    },
  },
  variants: {
    extend: {},
  },
  plugins: [],
};

Start Using Custom Font

Go to your Components or Pages, in this case for simplicity we are using _app.js file to custom font. Add className=”font-fontname” to the element. The fontName here refers to the name we gave to the font family in the previous step in this case Montserrat.

import Head from "next/head";
import Image from "next/image";

export default function Home() {
  return (
    <div>
      <Head>
        <title>Create Next App</title>
        <meta name="description" content="Generated by create next app" />
        <link rel="icon" href="/favicon.ico" />
      </Head>

      <main>
        <h1 className="w-full text-center py-12 font-Montserrat text-3xl font-bold">
          Hello world! Im Montserrat Font
        </h1>
      </main>
    </div>
  );
}

Now you will be able to see the custom font you just added to your app.

Code is available on GitHub repo.

How to Build a Multiselect Dropdown Component Using React-select

React select dropdown tutorial using react-select. (1)

In this tutorial, you will learn how to use react-select library to create a dropdown selection in your React app. Before that, let’s first understand what React-select is and why should you use this library in your React.js project.

React-select

React-select is an easy to use dropdown library create by Jed Watson and few other awesome contributors. It is a powerful library, offers various features such as multi-select, autocomplete and many more. This is a perfect choice for your next Reactjs project, providing numerous dynamic functionalities to the dropdown components including search and filter functionality, animation, easy accessibility and faster loading time.

Features provided by React-select package include:

  • Flexible approach to data with customizable functions.
  • It handle large number of dataset.
  • Simple customization with API support.
  • Controllable state props and modular architecture.
  • Manage component state easily.
  • CSS styling with emotion support. Provide CSS animation support for components.
  • Long-requested features like option groups, portal support, animation, and more

Step 1: Install React and other libraries

Dependencies used for this project.

  • React-Select Library
  • TailwindCSS for CSS and styling (optional- you can use any styling library)

Run the following command to install a brand new React project. You can either use yarn or npm, but for this tutorial, npx is used. This will create a React app for us.

npx create-react-app react-select

Change the directory and get inside to the project folder. You can always clean the project just a little bit. Remove the files you do not required for this project.

cd react-select

Install Tailwind CSS

Install TailwindCSS and its peer dependencies via npm, and then run the init command to generate both tailwind.config.jsand postcss.config.js.

npm install -D tailwindcss postcss autoprefixer
npx tailwindcss init -p

Configure your template paths

Add the paths to all of your template files in your tailwind.config.jsfile.

module.exports = {
  content: [
    "./src/**/*.{js,jsx,ts,tsx}",
  ],
  theme: {
    extend: {},
  },
  plugins: [],
}

Add the Tailwind directives to your CSS

Add the @tailwinddirectives for each of Tailwind’s layers to your ./src/index.cssfile.

@tailwind base;
@tailwind components;
@tailwind utilities;

Start using Tailwind in your project

Start using Tailwind’s utility classes to style your content and it will reflects the changes you make to the app.

Install React-Select Library

Now, this is important step. We need to install React-select package. For that simply run the following command.

npm i react-select

Once it is installed, you can now import the react-select module any where in our project. For simplicity it is imported in src/App.js file.

Now create a function that will handle our selected value. Name it setHandle and call it on the component. It will change the current value once user click to the dropdown.

import "./App.css";
import React, { useState, Component } from "react";
import Select from "react-select";

const Hotels = [
  { value: 1, label: "Coral Beach Maldives" },
  { value: 2, label: "Ilaa Beach Maldives" },
  { value: 3, label: "Finolhu" },
  { value: 4, label: "Arena" },
  { value: 5, label: "Kaani Beach Hotel" },
];

function App() {
  const [selectedOptions, setSelectedOptions] = useState(null);

  const setHandle = (e) => {
    setSelectedOptions(Array.isArray(e) ? e.map((hotel) => hotel.label) : []);
  };

  return (
    <div className="mx-auto container py-8">
      <h1 className="text-sm">Select Hotels</h1>
      <div className="flex flex-wrap items-center lg:justify-between justify-center">
        <div className=" px-2	">
          <Select options={Hotels} onChange={setHandle} isMulti />
        </div>
        <div>{selectedOptions}</div>
      </div>
    </div>
  );
}

export default App;

An array named Hotels is created, it then pass the hotel list to the dropdown. Hotel names is displayed when a user clicks on the dropdown and select element with the help of the react-select library.

There are many other properties available and common props you may want to specify include:

  • autoFocus – focus the control when it mounts
  • isDisabled – disable the control
  • isMulti – allow the user to select multiple values
  • isSearchable – allow the user to search for matching options
  • name – generate an HTML input with this name, containing the current value
  • onChange – subscribe to change events
  • options – specify the options the user can select from
  • placeholder – change the text displayed when no option is selected

React Multi Select Dropdown

Multi select option is one of the popular properties provided by this library. let us understand how this is used in a React project. It is actually very easy, simply you need to add isMulti prop to select various value in a select dropdown.

<Select options={Hotels} onChange={selHandle} isMulti />

Thats all for now! You can find code for this tutorial in this GitHub repo

How to Add Tailwind CSS to Your Reactjs Project

Tailwind CSS to ReactJS project

Tailwind CSS is a utility-first CSS framework which is used to make your website more responsive and beautiful. It is well known modern CSS frameworks which helps to speed up the development and styling process significantly. If you’re new to Tailwind CSS please follow the official documentation of Tailwind CSS and find a good starting point at the project’s homepage at TailwindCSS.

Setting up your React project with Tailwind CSS is so simple and comprises only very few steps. In this tutorial you will learn step-by-step approach of installing Tailwind CSS into your React project and get started using Tailwind’s CSS classes for styling.

Step 1: Creating Your React Project

Creating your new React.js project is the very first step. The easiest way to create a new project is to use the create-react-app script on the command line.

npx create-react-app react-app-with-tailwind

Now, cd into the working directory.

cd react-app-with-tailwind

If everything goes well, you should be able to see your react project on the web browser when you run the following command.  

npm run start

Step 2: Install Tailwind CSS

Now install tailwindcss and its peer dependencies via npm, and then run the init command to generate both tailwind.config.js and postcss.config.js.

npm install -D tailwindcss postcss autoprefixer
npx tailwindcss init -p

Tailwind will create two files. You need to make small changes so it will works well for our Reactjs project.

  • tailwind.config.js
  • postcss.config.js

Step 4: Configuring Template Files

You need to specify the path to our Reactjs project files by adding the following configuration setting inside tailwind.config.js. Make sure to add the paths to all of your template files in your tailwind.config.js file.

module.exports = {
   content: [
     "./src/**/*.{js,jsx,ts,tsx}",
   ],
   theme: {
     extend: {},
   },
   plugins: [],
 }

Step 5: Add the Tailwind directives to your CSS

Now add the @tailwinddirectives for each of Tailwind’s layers to your ./src/index.css file.

@tailwind base;
@tailwind components;
@tailwind utilities;

That’s all. You’re good to go! Let’s make use of Tailwind’s CSS classes within our main React component in App.js.

Step 6: Use Tailwind CSS In Your React App

Add the following code to App.js. Start the development web server by using the following command. Now you should be able to see the following result in the browser.

<div className="container mx-auto bg-gray-200 rounded-xl shadow border p-8 m-10">
      <p className="text-3xl text-gray-700 font-bold mb-5">
        Welcome!
      </p>
      <p className="text-gray-500 text-lg">
        React and Tailwind CSS in action
      </p>
    </div>
npm run start

You can find code for this tutorial in this GitHub repo

Best Free VS Code Themes 2022🤩

Best Free VS Code Themes 2022

It is already halfway through 2022 and if you are still looking for any VSCode themes, then here is the list of some of the most popular VS Code themes for 2022 so far.

List of the top 5 VSCode themes – My choice:

  1. Atom One Dark Theme
  2. GitHub Theme
  3. Night Owl Theme
  4. JellyFish Theme
  5. Sublime Material Theme

Atom One Dark Theme

One of the best dark theme port in the marketplace. Atom’s iconic One Dark theme for Visual Studio Code is so popular among developers who loves dark mode.

It has visually pleasing styles and well-blended color schemes, therefore it is considered as one of the most used themes, nearly 3.3 million download in the market place as of today.

Here are some of the stats:

  • No. of Installs:  3,279,542 installs
  • Rating:  4.81/5 (102)
  • Current version: v2.2.3 | 1/4/2021| Free

GitHub Theme

It is popular theme for developers who prefer GitHub’s classic themes. It comes with various new styles, simply you need to select any available theme during installation process. You can choose one of these themes.

  • GitHub Light Default
  • GitHub Light High Contrast ✨ new ✨
  • GitHub Light Colorblind ✨ new ✨
  • GitHub Dark Default
  • GitHub Dark High Contrast
  • GitHub Dark Colorblind ✨ new ✨
  • GitHub Dark Dimmed

There are also two older themes. Note: They might not get updated frequently and are kept for legacy reasons:

  • GitHub Light (legacy)
  • GitHub Dark (legacy)

Here are some of the stats:

  • No. of Installs:  4,349,035 installs
  • Rating: – (120)
  • Current version: v6.0.0 | 2/11/2022 | Free

Night Owl Theme

This theme is fine-tuned for those of us who really like to code late at night. It comes with both dark (Night Owl) and light theme (Light Owl). The color choices, background, and styling are perfectly suitable for developers who are having difficulties in low-light circumstances. ✨

Night Owl

Light Owl

Here are some of the stats:

  • No. of Installs:  1,463,301 installs
  • Rating: – (119)
  • Current version: v2.0.1 | 7/4/2021 | Free

JellyFish Theme

It is also a beautiful theme. The font (Hermit) and colors used by the theme is easy on the eyes. The colors used by this theme for highlighting code are Aqua Blue, Purple, Dark Yellow, and Pinkish-Red.

Here are some of the stats:

  • No. of Installs: 75,788 installs
  • Rating: – (5)
  • Current version: v0.0.4 | 2/8/2022 | Free

Sublime Material Theme

This is simply a port to align the style of the theme with the default VSCode chrome that cannot be changed atm. It has both dark and light theme options, however it was last update long time ago, in 2016.

Dark Theme

Light Theme

Here are some of the stats:

  • No. of Installs: 568,813 installs
  • Rating: – (25)
  • Current version: v1.0.1 | 11/27/2016 | Free

There are lots of amazing themes in the marketplace and these are just few. Must have themes at least in my opinion. Maybe you have a better choice and if you have any let us know your favorite theme that make you more productive.

If you want to know about best VSCode extensions for 2022 then please read this article.

Top 11 Best VS Code Extensions you Need in 2022!

The Best Machine Learning Books That All Data Scientists Must Read

best ml books

Machine learning is an exciting field that has been growing rapidly in recent years and it’s only expected to continue to grow as we move forward into the future. There are many different options and topics that data scientists can explore while they’re studying machine learning, but there are some core principles and key texts that you should definitely be familiar with if you want to be taken seriously in this industry.

Today, I’ll take a look at the top machine learning textbooks that I’m currently reading and why you should read as well.

1. Artificial Intelligence: A Modern Approach

Artificial Intelligence is a massive and multi-disciplinary field, so it’s no surprise that there are plenty of resources for those looking to jump into this field. The most highly rated textbook for AI students on Amazon is Peter Norvig and Stuart Russell’s Artificial Intelligence: A Modern Approach. This book was introduced in 1995, and has been updated multiple times since then. This is a heavy book with 27 chapters that covers problem solving and search, logic and inference, planning, probabilistic reasoning and decision making, learning, communication, perception and robotics. Basically everything from common algorithms to neural networks and natural language processing.

Topics Covered:

  • Logical Agents
  • Learning, communication, perception and robotics
  • Supervised, Unsupervised learning and Reinforcement Learning, Machine Learning models and Algorithms
  • Probabilistic Reasoning
  • Natural Language Processing

This book is not only for students but also used by many experts in the field. Here are a few reviews from academics and professionals in the subject.

Experts Opinions

I like this book very much. When in doubt I look there, and usually find what I am looking for, or I find references on where to go to study the problem more in depth. I like that it tries to show how various topics are interrelated, and to give general architectures for general problems … It is a jump in quality with respect to the AI books that were previously available. — Prof. Giorgio Ingargiola (Temple).

Really excellent on the whole and it makes teaching AI a lot easier. — Prof. Ram Nevatia (USC).

It is an impressive book, which begins just the way I want to teach, with a discussion of agents, and ties all the topics together in a beautiful way. — Prof. George Bekey (USC).

2. Deep Learning (Adaptive Computation and Machine Learning series)

Ian Goodfellow, Yoshoua Bengio, and Aaron Courville are three researchers who stand at the forefront of Deep Learning. It comes with general context and comprehensive knowledge on mathematical foundation of Deep Learning. This book is highly recommended to read if you want to start your journey with deep learning.

Topics Covered:

First few chapters cover mathematical concepts for deep learning. You will be able to grasp these without difficulty if you have a concise knowledge of linear algebra, probability and statistics. Part 3 covers Deep Learning Research which include different techniques and methods for deep learning which is quite challenging.

  • Numerical Computation
  • Deep Feedforward Networks
  • Optimization for Training Deep Models
  • Deep Learning Research

Experts Opinions

“Written by three experts in the field, Deep Learning is the only comprehensive book on the subject.” —Elon Musk, cochair of OpenAI; cofounder and CEO of Tesla and SpaceX.

“If you want to know here deep learning came from, what it is good for, and where it is going, read this book.” —Geoffrey Hinton FRS, Professor, University of Toronto, Research Scientist at Google.

3. Hands-On Machine Learning with Scikit-Learn, Keras, and TensorFlow: Concepts, Tools, and Techniques to Build Intelligent Systems 2nd Edition

This book is is a must-read book for everyone who seriously wants to enter this field. This is the perfect book for machine learning practitioners as it covers the most important aspects of machine learning, such as classification, regression, clustering, and dimensionality reduction. It simplifies highly complex concepts through concrete examples and real world example. It also provides detailed introduction of popular frameworks such as Scikit-Learn, Keras and TensorFlow. Author Aurélien Géron has put all the concepts in a beautiful manner so you can gain an intuitive understanding of the concepts and tools for building intelligent systems.

You need programming experience to get started, so learning Python programming language would greatly help to complete this book.

Topics Covered:

  • Introduction to machine learning and history
  • Use Scikit-Learn to track an example machine-learning project end-to-end
  • Explore several training models such as Support Vector Machines, Decision Trees, Random Forests, and Ensemble methods
  • Use the Tensor Flow library to build and train neural nets
  • Dive into neural net architectures, including convolutional nets, recurrent nets, and deep reinforcement learning
  • Techniques for training and scaling deep neural nets.

Experts Opinions

“An exceptional resource to study Machine Learning. You will find clear-minded, intuitive explanations, and a wealth of practical tips.” —François Chollet, Author of Keras, author of Deep Learning with Python.

“This book is a great introduction to the theory and practice of solving problems with neural networks; I recommend it to anyone interested in learning about practical ML.” — Peter Warden, Mobile Lead for TensorFlow.

4. Python Machine Learning – Second Edition: Machine Learning and Deep Learning with Python, scikit-learn, and TensorFlow 2nd Edition

You never want to miss this book If you really want to learn Machine learning. This is perfect book as its primary focus is exclusively on the implementation of a various machine learning algorithms. The book places a special emphasis on using Scikit-learn to implement these algorithms, and is a must for anyone looking to develop mastery around algorithm development.

Sebastian Raschka and Vahid Mirjalili has updated it to third edition in 2020, covering TensorFlow 2, ScikitlearnReinforcement learning, and GANs in the recent release.

Topics Covered:

  • Explore and understand the key frameworks for data science, machine learning and deep learning
  • Master deep neural network implementation using the TensorFlow library
  • Embed machine learning model in web application

These books are well worth to read if you want advance your machine learning knowledge and skills. I’ve printed copies of each book I mentioned above. In addition to that I also started to read several other ML books, pdf copies, watch YouTube videos and research papers to improve my ML skills and knowledge.

Why You Should Use DigitalOcean for Your Next Project

why you should use do for your next project

DigitalOcean offers easy-to-use managed cloud hosting service with simple user interface and powerful command line tools, which make it easy to deploy your code quickly and manage your server from anywhere on the globe.

DigitalOcean has invested significant of money to its infrastructure to make it truly a complete cloud engine. They have expanded geographic footprint, and introduced new products such as DigitalOcean Kubernetes, App Platform, and Managed Databases to its infrastructure. Companies such as Gitlab, Slack, Ghost, Cloudways and Whatfix are using DigitalOcean for years now.

App Platform

DigitalOcean App Platform is very easy to use and you can get started with it right away. It also have a lot of great features so you can build, deploy, and scale apps quickly as possible. DigitalOcean will handle the infrastructure, app runtimes and its dependencies, that means you can focus more on your code and its business logic.

With DigitalOcean, you can scale your apps to handle traffic as it grows. It is very cost effective and effectively optimize resources as you scale your apps.

Kubernetes & Load Balancers

With Kubernetes, you can easily scale up and deploy containerized apps in clusters. If you’re ready to start using containers but don’t want to worry about managing them, DigitalOcean is a great choice. Load balancers on DigitalOcean are simple to set up. It helps to manage distribute incoming traffic across a group of Droplets and increase your application’s availability with Load Balancers.

Introducing a new $4 Droplet

If you have an existing business or other online presence, then you’re likely familiar with the cost of hosting and managing multiple server instances. DigitalOcean is introducing a new Droplet priced at $4/month encouraging more developers across the globe to try its Droplets. This Droplet comes with 1 vCPU, 512MB memory, 500GB bandwidth, and a 10GB SSD, perfect for developers want to learn new skills and proof of concept for the next big app ideas. The price changes will be available starting July 1, 2022.

Backup

Backups are an important part of any hosting environment, but they’re often overlooked or not easy to implement. Droplet backups have always affordable and simple to enable. Backup Droplets disk images once per week, priced at 20% of the cost of the Droplet. If you destroy the Droplet, backups will also be removed and purged. However snapshots, on-demand full disk image of a Droplet work opposite. They will still be on your account until you delete it even after the Droplet is removed. Snapshots can be used to restore an existing Droplet or create a new Droplet from that point in time.

Developer Support

DigitalOcean offers free 24/7 technical support. There are three levels of support provided by the support team to meet your needs. You can send inquiries and contact the support team agent at any time and get help. They also have an active forum, a community where users can post questions and get answers from other developers. In addition, you can find number of comprehensive articles, tutorials and official docs related to any products and services they provide to the customers.

Read 8 Important Ways to secure DigitalOcean Droplets

In summary here are the few reasons I use DigitalOcean:

  • They provide virtual machine, Kubernetes, App platform, storage, database, and many more.
  • Easy to use, economical, scalable, and adaptable for web.
  • Affordable, reliable and quick deployment.
  • Server quality is great and server spec is perfect for various business.
  • Droplet backups are easy to enable and affordable.
  • Excellent tutorials and articles provided by the community and expert.

DigitalOcean grow with a global community. Whether you’re a developer looking to deploy your next project or an enterprise business company looking to build out a new product, DigitalOcean has a solution for you. So what are you waiting for? Try DigitalOcean today with a $100, 60-day credit to get started. That’s enough resources to run a website or app that you can build and start growing a successful business.

What’s new in Flutter 3

whats new in flutter 3 for let me fail

Introduction

Google announces Flutter 3. We all have been waiting for Material 3, Games Toolkit, macOS, Linux Support and Fordable Phone Support. Wait is over, finally it has arrived. Google and the open source community has put a lot of hard works to Flutter 2.0 and now they have released Flutter 3.0 with much more exciting features. Today we look into the new features that Flutter has in this major changes!

1. Flutter Firebase

A collection of tools is always necessary to have when building and launching applications. Data storage, cloud functions, authentication and app testing for different platform requires comprehensive third-party tools such as Firebase, AWS Amplify and AppWrite.

For example, Firebase is an amazing back-end platform backed by Google which accelerate app development process providing powerful backend infrastructure for the applications.

Flutter and Firebase work hand-in-hand to help you build web and mobile apps. This is not a surprise for any of us as we know both these products are belongs to one company, Google.

Read more about How to connect flutter with firebase backend.

Majority of Flutter developers use Firebase in their apps. Over the last few releases Flutter team have been working with Firebase to expand and provide better integration for Flutter as a first-class integration. Flutter Crashlytics plugin helps to track real-time fatal errors with the same set of features through Firebase’s real-time crash reporting service. Firebase Crashlytics is a lightweight, realtime crash reporter that helps you track, prioritize and fix stability issues that erode your app quality.

2. macOS and Linux Support

According to a 2021 developer survey, Flutter is the most popular cross-platform mobile framework used by majority of global developers. Flutter desktop support is still far behind compared to mobile support specially in its early releases.

Flutter was stable for Windows in previous versions and now it supports both linux and macOS as well. Now you can build apps for all desktop platforms without ever worrying of breaking your code. You can build production ready applications for all platforms using flutter.

3. Mobile Updates

Smoother experience

Flutter apps now contribute 120Hz refresh rates that were previously limited to only 60Hz on iOS devices. This increase helps to have a smoother experience on iOS devices specially during animations.

Fordable Phone Support

Finally the newest release supports for fordable mobile devices. The new widgets and its core features will bring more natural experiences to fordable devices.

4. Web updates

Faster image decoding and scrolling

Flutter web now automatically detects and uses the ImageDecoder API in browsers that support it. As of today, most common browsers have added this API. Because of ImageDecoder API the image rendering for web is more efficient and the speed is twice faster than the previous versions. In overall the performance is major improvement for new update.

App lifecycle API

The new lifecycle API provides you flexibility to control over the Flutter framework. Now you can run Flutter apps in headless mode on the web. This gives you the flexibility to control the bootstrap process of your app from hosting HTML page, and check Lighthouse analysis for the performance of your app. For example you could preload the content while showing a login screen or a progress bar! You can get more information, Customizing web app initialization on docs.flutter.dev.

5. Material 3

Material 3 is known as the next generation of Material Design. Flutter 3 does not have full support for material 3 yet, only certain widgets support material 3. Flutter 3 provides opt-in support for Material 3. Maybe in future release, all the widgets might have material 3 support and could be the standard default for flutter.

6. Theme Extensions

Theme extension feature enable themes more convenient. It enables customizing theme by adding custom colors and custom color names to the flutter theme. You are not stuck with default colors that comes with flutter anymore. It is now much easier than ever to add our own color to flutter apps.

7. Flutter’s Games Toolkit

The Flutter team has released an easy-to-use casual games tool kit for casual gamers. It is a specialized starter kit of various templates which mean you can write your game code with Flutter casual Games Toolkit.

Now you can deploy casual games much quickly on multiple platforms. Flutter game repo has pre-integrated modules for in-app purchases, Ads & more. However if you want to develop 3D games, then flutter is not the right choice rather you want to go for Unity 3D.

8. Dart 2.17

Dart 2.17 stable was announced along with Flutter 3.0 with many long-awaited features that developers have been waiting for. Dart is the secret sauce behind Flutter, and any improvements in Dart would help improve Flutter’s development.

According to Dart and Flutter team, Dart 2.17 adds major new support for members on enums, refines how you can use named arguments in constructors, and makes code for forwarding parameters to superclasses much less verbose and repetitive. We will look into the new features of Dart 2.17 in more details in the coming articles.

I can’t install react using npx create-react-app. Here’s the solution

gili lankanfushi

Problem

I was trying to use create-react-app but I got errors which doesn’t allow me to install new react project. The error is shown below:

If you've previously installed create-react-app globally via 
npm install -g create-react-app, we recommend you uninstall 
the package using npm uninstall -g create-react-app or yarn global 
remove create-react-app to ensure that npx

This message could be even stated in the error message you received:

You are running create-react-app 4.0.0, which is behind the 
latest release (4.0.1). We no longer support global installation 
of Create React App.

Solution

You must uninstall create-react-app with npm uninstall -g create-react-app

  1. Uninstall create-react-app v4.0.1
  2. Globally, update npm, clear the cache, and retry creating the app. Use the command below.
npm uninstall -g create-react-app && npm i -g npm@latest && npm cache clean -f && npx create-react-app@latest my-app --use-npm

Note: Some time this command alone will fix the issue.

Different versions of npm may also be helpful, and you may upgrade using the command below. Please keep in mind that this may have an impact on other projects on your system.

Create a Responsive Layout in Flutter

Create a Responsive Layout in Flutter

Flutter is a powerful choice for web and mobile apps development. In Flutter, we can create a fully responsive designs for several platforms using one code base. As we all know a responsive design ensures the appeal of our application is consistent and gives users a seamless experience, no matter the size of the device. For example, when the screen size of the browser extends to a certain width the layout of the app will be changed.

In this short article, we’ll be covering how to create responsive designs in Flutter for web and mobile devices.

Getting Started

To begin, we’ll simply use the app we created in previous tutorial that looks like something like this👇.

💡 For simplicity we are using fixed numbers for screen resolution but when designing user interfaces for mobile apps, always avoid hardcoding numbers for widget sizes and instead utilize percentages. The MediaQuery class in Flutter may be used to do this.

Let’s work on coding…

Make a folder named layout and inside that create new file called layout.dart. Create a stateless widget for now, later we can use a stateful widget when we fetch dynamic contact from backend. We want to return a widget named ResponsiveLayout which helps in creating responsive layout. LayoutBuilder will give us a builder function which then return to us a context and constraints. Using constraints we can get the screen width.

Now create a file named dimensions.dart in the utils folder. Our web screen size starts at 600 resolutions so we will display web layout when the screen size is at 600 and above.

Now we want to create webScreenLayout and mobileScreenLayout widgets and accept these two widgets using a constructor as shown.

class ResponsiveLayout extends StatelessWidget {
  final Widget webScreenLayout;
  final Widget mobileScreenLayout;
  const ResponsiveLayout(
      {Key? key,
      required this.webScreenLayout,
      required this.mobileScreenLayout})
      : super(key: key);

We have accepted those two widgets via a constructor and we want to return those two widgets.

import 'package:flutter/material.dart';
import 'package:flutter_gradient_example/utils/dimensions.dart';

class ResponsiveLayout extends StatelessWidget {
  final Widget webScreenLayout;
  final Widget mobileScreenLayout;
  const ResponsiveLayout(
      {Key? key,
      required this.webScreenLayout,
      required this.mobileScreenLayout})
      : super(key: key);

  @override
  Widget build(BuildContext context) {
    return LayoutBuilder(
      builder: (context, constraints) {
        if (constraints.maxWidth > webScreenSize) {
          return webScreenLayout;
        }
        return mobileScreenLayout;
      },
    );
  }
}

Now go to main.dart file and replace Center widget with ResponsiveLayout. We then import layout.dart file top of the main.dart file. Then pass both mobileScreenLayout and webScreenLayout as shown below.

It is time to create mobile_screen_layout.dart and web_screen_layout.dart file, so we can use these two widget on main.dart.

import 'package:flutter/material.dart';

class MobileScreenLayout extends StatelessWidget {
  const MobileScreenLayout({Key? key}) : super(key: key);

  @override
  Widget build(BuildContext context) {
    return Scaffold(
      body: Center(
        child: Text("This is Mobile Screen"),
      ),
    );
  }
}

We use same stateless widget in both the widget. Make this simple for now by displaying a text on the screen as shown.

import 'package:flutter/material.dart';

class WebScreenLayout extends StatelessWidget {
  const WebScreenLayout({Key? key}) : super(key: key);

  @override
  Widget build(BuildContext context) {
    return Scaffold(
      body: Center(
        child: Text("This is Web Screen"),
      ),
    );
  }
}

Now run the app in google Chrome and also in a mobile simulator. So we can test the app. For that run:

flutter run -d chrome

If you want to see it on iOS simulator then run:

open -a simulator

You will notice it is working as expected. When we reduce the chrome screen size to 600 and below it changes to mobile view.

How To Add Your Own Color to a Flutter App

How To Add Your Own Color to Flutter App

Introduction

Learning Flutter is a great idea. Flutter is great if you want to build a career in mobile app development. I’ve planned to write short series based articles on the things I learned about flutter.

In this article, you will explore how to change the overall look across your apps with Flutter themes.


Step 1 — Setting Up the Project

To create a new flutter application simply run the following command. Oh do not forget to complete the installation process of flutter SDK, its prerequisites and the environment setup.


flutter create flutter_custom_theme_example

Flutter create command will give us a demo application that will display a simple clickable button which increment the numbers as we click the button. Now navigate to the new project directory that we just have created.


cd flutter_custom_theme_example

We need to see how our code looks like on the simulators. For that simply run the following code below. We want to enable hot reloading so it reflects the changes as we make to our code.

open -a simulator

Now that you have a working boilerplate Flutter application. It is the time to add customization to the app.


Step 2 — Customize Global Themes

Create a new folder named utils inside lib folder. Create a new file colors.dart inside utils.


import 'package:flutter/material.dart';

const mobileBackgroundColor = Color.fromRGBO(0, 0, 0, 1);
const mobileSearchColor = Color.fromRGBO(38, 38, 38, 1);
const blueColor = Color.fromRGBO(0, 149, 246, 1);
const primaryColor = Colors.white;
const secondaryColor = Colors.grey;

Now we have created a color style globally for our application which can be used anywhere in our app. Open main.dart file and remove all the code given by flutter by default.

We want add dark theme to our app, therefore add dark theme using themeData given by flutter. Next add Scaffold widget to the main.dart file. Now we can see it has changed to default dark color provided by flutter team.


import 'package:flutter/material.dart';

void main() {
  runApp(MyApp());
}

class MyApp extends StatelessWidget {
  // This widget is the root of your application.
  @override
  Widget build(BuildContext context) {
    return MaterialApp(
      debugShowCheckedModeBanner: false,
      title: 'Flutter Custom Color Example',
      theme: ThemeData.dark(),
      home: Scaffold(body: Text('Flutter custom color example')),
    );
  }
}

We want a different colors, so this is the point we want to use colors.dart file created earlier so that we can use our own dark theme colors. Import colors.dart file inside our main.dart file. Then add our custom color to themeData shown below code.


import 'package:flutter/material.dart';
import 'package:flutter_custom_theme_example/colors.dart';

void main() {
  runApp(MyApp());
}

class MyApp extends StatelessWidget {
  // This widget is the root of your application.
  @override
  Widget build(BuildContext context) {
    return MaterialApp(
      debugShowCheckedModeBanner: false,
      title: 'Flutter Custom Color Example',
      theme: ThemeData.dark().copyWith(
          scaffoldBackgroundColor: mobileBackgroundColor,
          primaryColor: secondaryColor),
      home: Scaffold(
        appBar: AppBar(
          title: const Text('Flutter custom color example'),
        ),
        body: Center(
            child: Text(
          'Flutter custom color example',
        )),
      ),
    );
  }
}


Thats it! Now we have added our own custom colors to the flutter app. Yes this is very basic styling however in future tutorial we can add more styles and colors to flutter apps. You can find full code in this Github repo.